
Astro 提供的免费卫星电视服务。终身收看娱乐,新闻,学习和资讯节目等。
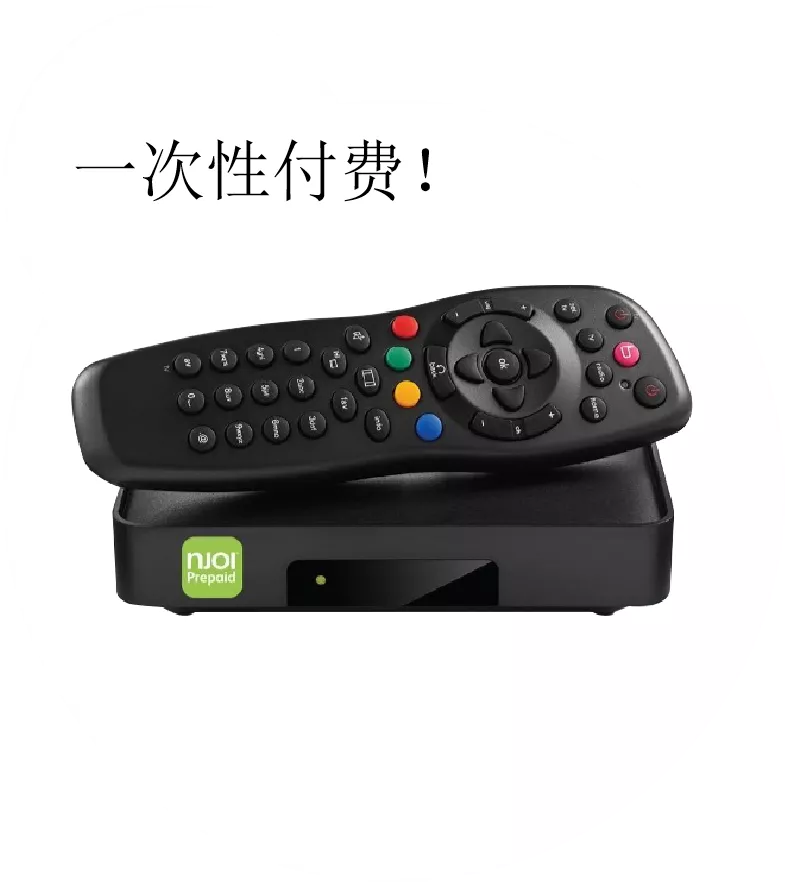
图片仅供参考。
免费观看15多个电视频道和10+个广播频道。
* 需遵守Astro条款和条件。

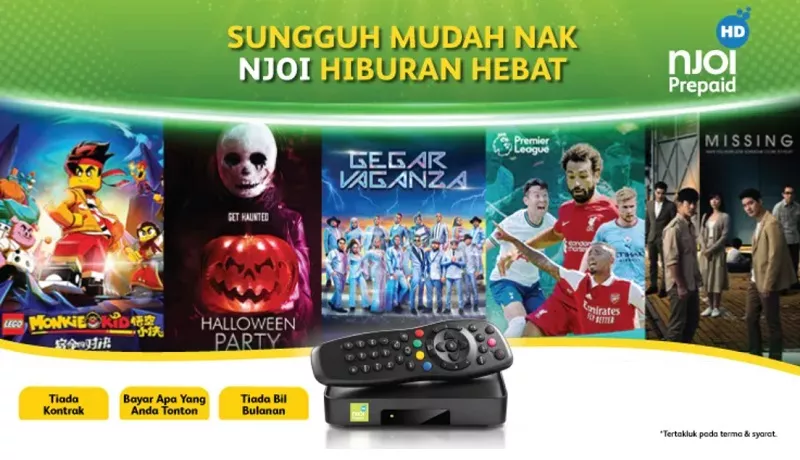
步骤一 |
步骤二 |
步骤三 |
选择配套然后提交您的申请。 |
等待安装。 |
享受您的新 Astro / 宽频! |
Astro 提供的免费卫星电视服务。终身收看娱乐,新闻,学习和资讯节目等。
图片仅供参考。
新的解码器,不包含卫星天线和电缆。您必须已安装 Astro/Njoi 卫星天线和电缆并正常运作。
包括安装。
新的解码器配有卫星天线和电缆。
包括安装。
签购
| Njoi Astro UniFi Maxis |
在这里找到您要的答案。
我们提供一站式服务为您申请Astro和Broadband。不必开车,排队和在销售柜台等候。 我们可以帮助您处理您的申请。
我们不收取额外费用。 无需提供信用卡信息。 费用与您在销售柜台申请的费用相同。
首先,您可以在线申请,我们将在工作时间内立即与您联系。 通过WhatsApp/电子邮件/传真发送您的身份证-IC(马来西亚公民)/ 护照(外国人)的复印件给我们。 收到所有资料后,我们将立即处理您的申请。
一旦收到您的完整资料,我们将在工作时间内立即处理您的申请。一旦您的申请获得批准,服务提供商的承包商将与您联系以进行安装预约。
ASTRO 和宽频收费同时在一张账单,享受更大的节省和无忧的账单支付。 在24个月的合约期内,您可以每月以折扣价享受 Astro 和宽频。
Astro 提供多种电视配套,包括娱乐、体育、电影和儿童配套。您可以选择符合您观看需求的配套,并在适用情况下添加额外的串流应用服务。
可以,您可以只订阅 Astro 电视配套而无需绑定宽频。不过,将 Astro 电视与光纤宽频绑定可享有更好的每月优惠,并且只需支付一张综合账单,更加方便。
对于小型家庭以及轻度上网和串流使用者,100Mbps 通常已足够。较大家庭、游戏玩家或重度串流用户则可选择 500Mbps 或 1Gbps 配套,以获得更流畅的多设备使用体验。
大多数 Astro 电视和光纤宽频配套都附带 24 个月合约期。如在合约期满前取消服务,可能会产生提前终止费用。
可以,您可在符合资格及覆盖范围的情况下随时升级电视配套或宽频速度。根据升级情况,可能需要重新计算合约期限。
您的每月账单将由 Astro 直接发出。您可通过电子邮件接收账单,或通过 Astro 账户在线查看。绑定配套用户将收到电视与宽频服务的综合账单。
付款方式包括网上银行、自动扣款、信用卡或 Astro 提供的其他认可付款渠道。我们的团队将在申请过程中为您提供协助。
如果您遇到任何服务中断问题,可联系 Astro 客户服务寻求技术协助。大多数情况下可远程解决,如有需要将安排技术人员上门处理。
可以,迁移服务需视新地址是否在服务覆盖范围内而定。根据您的配套,可能会产生迁移费用及合约调整。
不需要,提交申请时无需提供信用卡资料。服务获批后,付款安排将由 Astro 直接处理。
部分 Astro 电视配套可根据当前促销及服务情况添加串流服务等附加项目。可能需支付额外月费。
是的,光纤安装时通常会提供 WiFi 路由器。路由器型号可能会根据所选宽频速度配套而有所不同。
可以,我们会在处理您的申请前确认您地址的服务覆盖范围,以确保该地区可安装宽频服务。
马来西亚公民需提供 MyKad 复印件。外籍人士则需在提交宽频申请时提供护照复印件。
申请获批后,服务提供商通常会在 2 至 7 个工作日内联系您安排宽频安装预约。
大多数 Astro 宽频配套附带 24 个月合约期,从安装日期开始计算。如您搬迁,可能需要在新地址重新签订 24 个月合约。
可以,您可在新地址具备服务覆盖的情况下迁移宽频服务。合约期限可能会从新安装日期起重新计算 24 个月。
可以,您可申请在家中调整宽频设备位置。若属于非标准安装,可能会产生额外费用,并需在评估后直接支付给安装人员。
可以,您可转用 Astro 宽频。为避免服务中断,建议在终止现有宽频合约前先开通新的宽频服务。
标准安装在促销期间可能免费,但非标准安装(如设备迁移或复杂布线)可能会产生额外费用,并需直接支付给安装人员。
The change in due date to 25 days after your billing date is to ensure that your transactions will be processed in a timely manner and subsequently ensure you will enjoy uninterrupted viewing. Please be assured that this change will not affect your monthly bill amount. Kindly check your latest monthly bill statement for more details about this revision.
You need to identify your modem type by looking at the modem light indicator before proceeding with troubleshooting.
The type of modem is indicated as per below:
MODEM INDICATOR 1
MODEM INDICATOR 2
MODEM INDICATOR 3
BTS 1

3. Please ensure the LAN cable is securely connected from router to your devices (Astro Box/Laptop etc.)
Modem connection
Router connection
4. Now, power on modem and router, wait for 2 minutes to stabilise the devices after reboot. Your internet services should be restored.
5. If issue persists, please connect to our agent and attach your modem light indicator picture for further assistance.
BTS 2
1. Please power off your modem and router.
(This is to refresh your modem and router performance)
2. Make sure the fibre cable from your wall socket to modem is securely connected.
3. Please ensure both LAN cables on the Modem (LAN Port 2) and Router (Port 1) are properly connected.
Modem connection
Router connection
4. Power on your modem and router, wait for 2 minutes to stabilise the devices after reboot. Your internet services should be restored.
5. If issue persists, please connect to our agent and attach your modem light indicator picture for further assistance.
BTS 3
1. Please ensure your modem and router power plugs are securely connected to the power socket.
2. Alternatively, try to connect the power plug to a different power socket or power source. This step is to eliminate the possibility of faulty power socket which could cause the issue.
3. If issue persists, please connect to our agent for further assistance.
You will receive two SMS notifications with tracking numbers separately from the courier service, one for the Plug & Play Box and one for the Astro SIM card. Please expect these SMS notifications to be sent to you within 2-3 working days upon successful order submission (online or via retailer).
There will be no changes to your Netflix account when you move to a new address.
Yes, any active Astro subscriber with a minimum primary subscription fee of RM100 can subscribe to a Multiroom (Astro Box) at a price of RM49.99 monthly with the box setup (subscription price is subject to Govt Tax).
For Platinum Pack and Multiroom Smart TV customers, Astro GO+ will be automatically added to your subscription.
Your bill statement will include details of your monthly subscription charges; e.g. charges for your chosen Astro packages and Broadband service. It will also show the time period of which your first bill will cover, as well as indicate how much the total charges are and when the payment due date is.
STEP 1
On your remote, press the Home button and the Home Page will be displayed on your screen.
STEP 2
Navigate to Profile.
STEP 3
The Profile Selection Screen will be displayed.
STEP 4
Navigate to Edit Profile.
STEP 5
Choose a profile to edit.
STEP 6
Navigate to Delete Profile.
STEP 7
Click Confirm to delete your profile.
STEP 8
The deleted profile will be removed from the Profile Selection Screen.
This Disney+ Hotstar software update will be rolled out progressively to all Ulti Box customers starting 23 August 2022. Please be assured that you will be able to access the Disney+ Hotstar app on your Ulti Box soon.
If you need further assistance, please call our Customer Contact Centre or WhatsApp "DH Help
We are always updating the Multiroom (Smart TV) app to ensure our customers get to enjoy the best entertainment experience. We will keep you posted if you are able to enjoy more 4K UHD channels in the future!
The Liga Malaysia will be available for all Astro customers starting 3 May 2024 as part of your Astro subscription at no additional cost until further notice.
In your first Astro bill, the first month's bill will be deducted accordingly excluding tax. You will still need to pay the full tax amount for your first month as per your first month's bill.
Note: Advance payment is only applicable to Astro TV pack purchases. If you subscribe to an Astro Fibre + TV bundle, only one month of your TV subscription fee (excluding tax) is required to be paid upon sign-up. The full tax amount and the first-month subscription fee for Astro Fibre will be paid on your first month's bill.
Tap on the "Account' tab on the navigation bar and scroll to "Billing' section. Tap on "Bill Statement' to view any bill statement up to six (6) months.

Step 1:
Type ASTRO EBILL <Your 10-Digit Smart Card Number> <Your Email Address>
Example: ASTRO EBILL 0156123412 abcdabcd@gmail.com
Step 2:
Send SMS to 66688
Note: This request must be sent from account holder’s mobile/primary number
*Standard telco charges and Terms & Conditions apply
Connect your PVR to Wi-Fi and enjoy access to our library of Video On Demand. Replay old seasons, catch-up latest episodes of your favourite shows, anytime you want. To connect your PVR, follow the steps below depending on your box type:
(a) Wi-Fi Enabled PVR (DMT5)

· Press the “Home” button and select “Settings” > “Network” > “Wi-Fi”
· Allow the PVR to scan Wi-Fi networks available and subsequently choose your home Wi-Fi network > Enter your Wi-Fi password if required
· Once connected, the icon below will appear on the screen.

Tip: Use the alpha-numeric keyboard on your Astro Remote to key in your password
· Press the “Home” button and select “On Demand” to start watching videos on demand!
(b) Non-Wi-Fi Enabled PVR (HD PVR)

There are two ways to connect your HD PVR decoder to your home Wi-Fi
(i) Using the Ethernet (LAN) cable
· Plug in the LAN cable from your modem into the PVR network port
· Once connected, the icon below will appear on the screen
· Press the “Home” button and select “On Demand” to start watching videos on demand!
(ii) Using an Astro Wi-Fi dongle as per shown below

Step 1 - Plugin the Wi-Fi dongle into the front USB part of your PVR decoder.
Step 2 - A prompt will appear stating "Do you wish to connect to a wireless network?", select "Yes, continue."
Step 3 - Once connected, the Wi-Fi icon will appear on the screen. Now you are ready to download and enjoy Astro's on demand entertainment.
Step 4 - Press the “Home” button and select “On Demand” to start watching videos on demand!
*The Wi-Fi dongle is only applicable for the non-Wi-Fi enabled PVR (as per the picture).

1. Please use a LAN ethernet cable and connect your computer/ laptop to the back of the Maxis Router.
2. You may open any web browser such as Google Chrome, Internet Explorer, Mozilla Firefox, etc.
3. On the address bar, please go to http://192.168.1.254 and the page below will appear.

The default login of the router as below. If you have done a configuration on your router and changed your password previously, please use the password you have previously set.
Username: administrator
Password: Router S/N (Available on the sticker at the back of the router)
4. Once you have successfully login, the router's web-based setup page will appear.

5. From the left menu, select WIRELESS to access the screen below.

6. You may change the Channel selection by scrolling down to the Advanced Setup.

7. To change the channel on 2.4 GHz and 5 GHz, click the drop-down arrow for Channel, then select your desired channel.
Then, click "Apply" for the changes to take place.

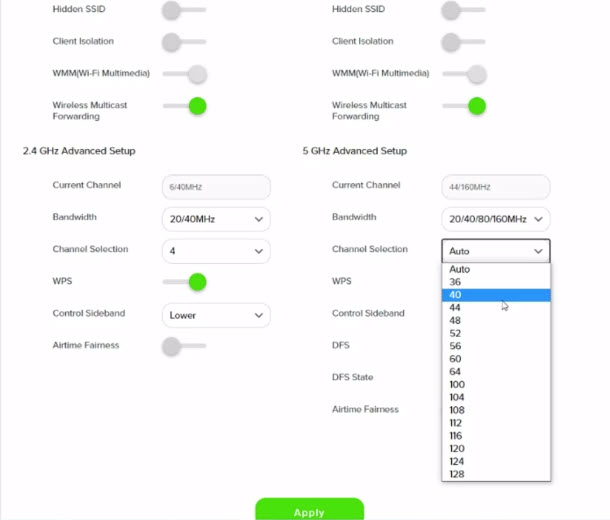
8. A warning box will popup, click "OK" for the changes to take place.

9. Please wait until the connection reestablish.

Tap on the "Account' screen on the navigation bar and scroll to the "Subscription' section. Tap on "TV Pack' to view your pack, box, multiroom, and Astro GO information.

You will regain access to your channels on Astro immediately once the equipment has been installed at your new house, provided your account is active. Customers can still enjoy viewing via Astro Go.
(i) Head over to My Astro Portal and go to 'Bill & Payment'. Click on 'Payment History'
(ii) Contact us via one of these platforms. Please ensure you include your Astro Account Number.
Please ensure you:
a. Have your original identification card “MyKad” (Front & Back) with you (Malaysian).
b. Have your original Passport & Visa with you (Non-Malaysian).
c. Are in a brightly lit environment
You can proceed with below troubleshooting if the weather is good. Ortherwise, you may try again later.
STEP 1
On your remote, press the “HOME” button and the home menu will be displayed at the bottom of your screen.
STEP 2
Navigate to SETTINGS and press “OK”.
STEP 3
Navigate to STB DIAGNOSTICS and press “OK”.
STEP 4
Refer to the signal strength % shown on the top left of your screen.
If it is 65% or higher, please go to WhatsApp to receive further help.
If it is below 65%, please go to STEP 5.
STEP 5
Switch off the power for your box and make sure that the adapter’s power light is off.
STEP 6
Unscrew the satellite cable from the box and pull it out.
STEP 7
Plug the satellite cable back into the box and screw it back securely.
STEP 8
Switch on the power for your box and make sure that the adapter’s power light is on.
Please wait for 5 minutes.
STEP 9
Turn on your box. You should no longer be experiencing this issue.
If issue persist, please attach a picture of your General tab of the STB Diagnostics for assistance.
Centralized Dish
If issue persist under a centralised satellite dish, please refer to your respective Building Management before contacting our agents.
Yes, you can. Go to the Account tab and scroll to "Subscription' section. Select "TV pack', select "Main room' or "Multiroom' and then click the "Refresh' button.
STEP 1
Switch off the power for your box and make sure that the adapter's power light is off.

STEP 2
Locate the SIM card at the left side and gently pull it out.

STEP 3
Wipe the SIM card's gold chip clean using a dry soft cloth.

STEP 4
Make sure the gold chip is facing down and reinsert it all the way in.

STEP 5
Switch on the power for your box and make sure that the adapter's power light is on.
Please wait for 5 minutes.

STEP 6
Turn on your box. You should no longer be experiencing this problem.

If issue persist, please submit the issue on our Feedback Form with the error details and provide sim card number for assistance.
Please refer to these FAQs for more information, or click here to learn more and sign up for the Ulti Box. Alternatively, you may call 03-7481 8000 to get in touch with an Astro representative.
STEP 1
Press "HOME" button on your remote control.

STEP 2
Navigate to Settings and press "OK".

STEP 3
Navigate to Display and press "OK".

STEP 4
Navigate to Resolution and press "OK".

STEP 5
Navigate to your preferred selection and press “OK”.

STEP 6
Select Yes, continue and press "OK" to confirm on the changes.
Otherwise, select No, go back to cancel.

Of course not! It is a value-added service introduced for your convenience.
The promotion period of Astro Fibre’s Speed Upgrade Campaign is from 24 November 2023 until 31 May 2024.
1. Ensure power cable is connected tightly.
2. Try to use another power socket / power source to eliminate faulty power sockets/power sources which could cause the issue.

3. If the issue persists, submit your feedback form for further assistance.
STEP 1
Press "HOME" button on your remote control.
STEP 2
Navigate to Settings and press "OK".

STEP 3
Navigate to Display and press "OK".

STEP 4
Navigate to TV Settings and press "OK".

STEP 5
Navigate to Conversion for 4:3 Input Video, select your preferred selection and press “OK”.

STEP 6
Select Yes, continue and press "OK" to confirm on the changes.
Otherwise, select No, go back to cancel.


Disabling band steering means that there will be two frequency bands available for the users - 2.4GHz and 5GHz.
Note: Band Steering is called Dual-band Combination in the router web interface.

Login using your username and password if you have changed the router login setting. Otherwise, your default router login is as per below.
Username: user
Password: user
4. Once you have successfully logged in, the router's web-based setup page will appear.

5. At the top of the page, click Wi-Fi to configure the WiFi parameters.

6. Click on Dual-band Combination button to disable the Band Steering.

7. Set the Wi-Fi name and Wi-Fi Password for both 2.4GHz and 5GHz bands based on your preference. Then click "Apply" for the changes to take place.

8. Kindly ensure to reconnect your WiFi according your new WiFi name and password.
Currently, My Astro app and web supports TV pack upgrade. You can go to "Account' and scroll to "Subscription' section and select "TV pack'. You may reach out to us via WhatsApp at 03-9543 3838 for more details.
For Ultra and/or Ulti box users, launch the My Astro app on your Home screen and you will land on the My Astro account dashboard. Press ">' remote button to go to your Subscription card and "OK' button to proceed with the TV pack upgrade.

1. Please connect your computer or laptop to your Astro Fibre router using LAN cable. Your LAN cable must be connected from the yellow port of Astro Fibre router (Any available port).
2. Once connected, open any web browser such as Google Chrome, Internet Explorer, Mozilla Firefox and etc.
3. On the address bar, type http://192.168.100.254 and below page will appear.

Login using your username and password if you have changed the router login setting. Otherwise, your default router login is as per below.
Username: user
Password: user
4. Once you have successfully logged in, the router's web-based setup page will appear.

5. At the top of the page, click More to configure the WiFi parameters.

6. From the left menu, select WLAN and choose Wi-FI Advanced Network to access the screen below.

7. To change the channel on 2.4 GHz and 5 GHz, click the drop-down arrow for Channel, then select your desired channel.

8. Then, click "Apply" for the changes to take place.

STEP 1
On your remote, press the HOME button and the home menu will be displayed on top of your screen.

STEP 2
Navigate to Guide.

STEP 3
Select the channel you would like to add to favourite list and press "OK".

STEP 4
Select "Add to Favourites" and press "OK".

STEP 5
You are successfully added the channel to favourite list when this screen appears.

STEP 6
Your selected channel will have a heart tagging after added as favourite.
Yes, existing non-Primary Pack customers who add on 50Mbps to their subscription will get to enjoy high speed broadband for only RM60/month and a free speed upgrade to 100Mbps for 24 months. Please note that a new 24-month contract will start upon successful installation.
Your Astro Rewards tier is based on how long you've continuously been an Active Astro Pay TV customer:
The rewards you will receive depends on which tier you're in. Rewards are cumulative: If you're in Diamond tier, you will be able to enjoy all the benefits from Magenta, Silver, and Gold tiers.
If you cancel your Astro Pay TV services but resubscribe at a later date, your duration (year) with us will reset to zero and restart according to your new activation date. Your Astro Rewards tier will reset to Magenta.
If you would like more information or to provide feedback, kindly log in to our support page via support.astro.com.my. For more questions regarding Astro Pack, you may reach out to us via call at 03-7481 1000 (Monday to Friday, 9AM – 6PM exclude public holidays).
Your Astro account number is a 10-digit combination
E.g: 08XXXXXXXX
Although it is possible to pair the second mesh node unit with the first mesh, customers are advised to follow similar steps in setting up the Mesh Network by pairing the mesh unit with the WiFi router instead.
The RM15 monthly rebate (before Govt. Tax) will be applicable to all on-going Multiroom Smart TV subscriptions until further notice. However, in the event of rebate expiry, Astro will notify impacted customers in advance via email or SMS. To update your contact details, please reach out via a feedback form here.

1. Please use a LAN ethernet cable and connect your computer/laptop to the back of the Maxis Router.
2. You may open any web browser such as Google Chrome, Internet Explorer, Mozilla Firefox, etc.
3. On the address bar, please go to http://192.168.1.254 and the page below will appear.

The default login of the router as below. If you have done a configuration on your router and changed your password previously, please use the password you have previously set.
Username: administrator
Password: Router S/N (Available on the sticker at the back of the router)
4. Once you have successfully login, the router's web-based setup page will appear.

5. From the left menu, select WIRELESS to access the screen below.

6. You may change the Network Name (SSID) and the Password to follow your preferences, then scroll to bottom and click "Apply" for the changes to take place.

7. A warning box will popup, click "OK" for the changes to take place and reconnect to the new wireless name with the new password once completed.

8. Please wait until the connection reestablish.

Not all shows/channels will be available on Astro GO as this depends on contractual rights with specific guidelines on the entitlement of these shows/channels and what you have as a part of your subscription.
Below are channels that are not available on Astro GO:
Please be assured that Astro is continuously working on getting more content available on Astro GO.
Astro ID and / or account deletion is permanent. Upon deletion, it will be unlinked from your TV subscription account and you will be logged out from all the associated Astro apps and / or services connected including the partner apps that you have logged in using the same Astro ID. If you have any queries regarding Astro ID or would like to request for Astro ID account deletion, click on submit your request here, fill in the required details and our Astro representative will get back to you within 3 business days for security verification purposes.
The main features and changes in this update are the revamped look and feel of Astro's user interface on the Astro Ultra/Ulti Boxes and Astro GO, which include redesigns to the Astro interface that consists of title rows at the Home Page to feature popular franchises, new live programmes posters and changes to the menu bar for easier navigation; auto-start Interactive Mode on Astro GO; as well as a Picture-in-Picture mode that shrinks your video player so you can keep watching your favourite shows while using other apps.
The details of each feature are:
For more info, please read our dedicated FAQ on this here.
STEP 1
Identify your remote control:

a) Remote control with Astro logo at the bottom of the remote, proceed to STEP 2.
b) Remote control with Astro logo at the top of the remote, proceed to STEP 4
STEP 2 (Astro Logo at the bottom of the Remote)
On your remote, press the “set tv” button and set tv instructions will be displayed on top of your screen:

STEP 3
Follow the steps appear on the TV screen to sync your Astro remote and complete the setup.

STEP 4 (Astro Logo atthe top of the Remote)
Press and hold “tv input” key on bottom left of the remote for 3 seconds until the LED blinks twice.

STEP 5
Enter the 2-digit TV Code of your TV Brand and the LED will blink twice:

STEP 6
Try out the TV controls (TV Standby or adjust Volume) to check if they are working correctly.

STEP 7
Press ok and wait for the LED to blink twice to save the settings.
The Kids Friendly Profile is an enhancement to the Kids User Profile feature with the following major improvements:
These enhancements are available across the Astro GO app, Ultra/Ulti Box, and Multiroom Box/Smart TV app.
Click here to find out more on this new feature and how to use it!
The eKYC link is only valid for 3 days to complete the eKYC verification process. You will be required to submit a fresh Astro account application.
Customers with a Movies subscription via Movies, Premium 1, Premium 3 or Platinum Packs will be able to access Disney+ Hotstar on the Ultra Box and Ulti Box. Alternatively, customers can add on the 3-months Disney+ Hotstar pass for only RM54.90. Subscribe to Disney+ Hotstar via astro.com.my/Disney.
No, anyone can make payments on your behalf as long as the credit card is used by the owner themselves.
Yes, there are five digital bill platforms available for all customers to check their Astro bills:
A. MyAstro Web
1. Visit www.astro.com.my
2. Goto “My Account”, then select “Manage Account”
3. Login to My Astro Web using your Astro ID
4. Select “Account” to view your bills
B. My Astro app
If you do not have it installed, you may download it here (Google Play Store) or here (IOS App Store)
C. WhatsApp
Just WhatsApp “Hi” to 03-9543 3838 and then follow the instructions to view your bill, account status, pay and download bill.
Note: You are required to provide your MyKad/PassportNo. to view your bill, account status and pay your bills. To download your bills, you will be required to provide your Account/Smartcard No.
D. Astro Quick Pay
1. Visit https://pay.astro.com.my
2. Enter your 10-digit Astro Account Number and follow the instructions to view your bill, account status, pay bills or add a billing reminder on your Google calendar.
E. IVR
1. Call +603-95433838
2. Press 1 for Account Related Queries
3. Input your 10-digit Astro Account no. or 12-digit MyKad no.
4. Press 2 for Payment and Billing
5. Press 1 to receive an SMS with your bill balance and a link to pay online
F. Channel 200
Ensure your Ultra or Ulti Box is connected to the internet. Tune in to CH200 and follow the instructions displayed on your TV screen to view your bill amount.
G. Auto-Debit
Alternatively, please register for Auto-Debit by following the steps here for hassle-free payments.
STEP 1
Press "HOME" button on your remote control.

STEP 2
Navigate to Settings and press "OK".

STEP 3
Navigate to STB Diagnostics and press "OK".

STEP 4
From General Tab, take a look at the Current Entry Point Name for the LNB type of your input source.