
Astro 提供的免费卫星电视服务。终身收看娱乐,新闻,学习和资讯节目等。
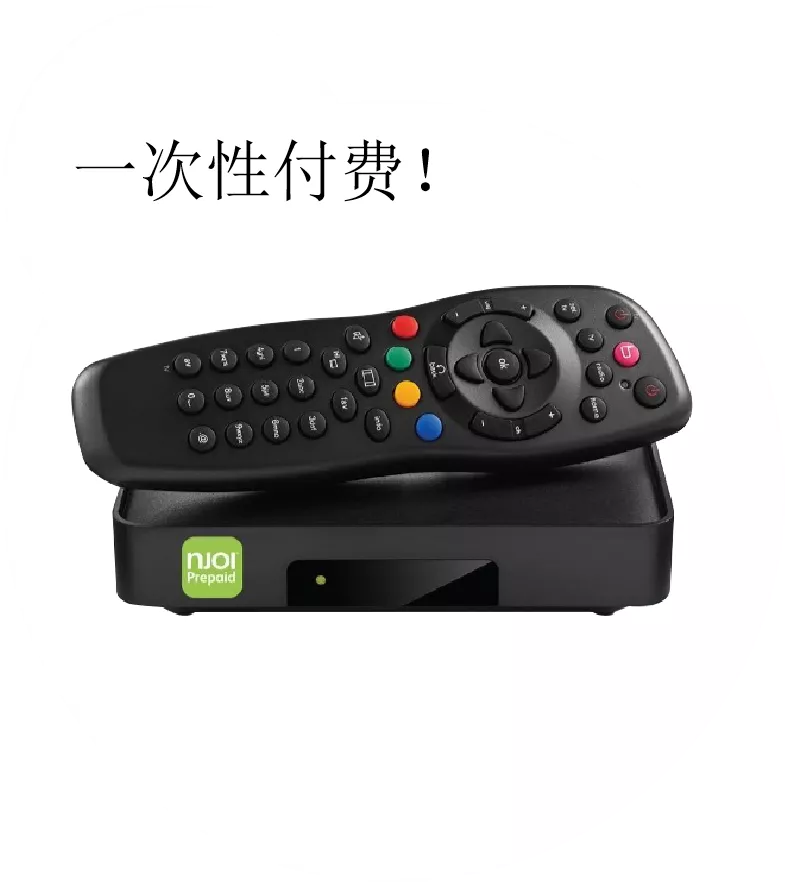
图片仅供参考。
免费观看15多个电视频道和10+个广播频道。
* 需遵守Astro条款和条件。

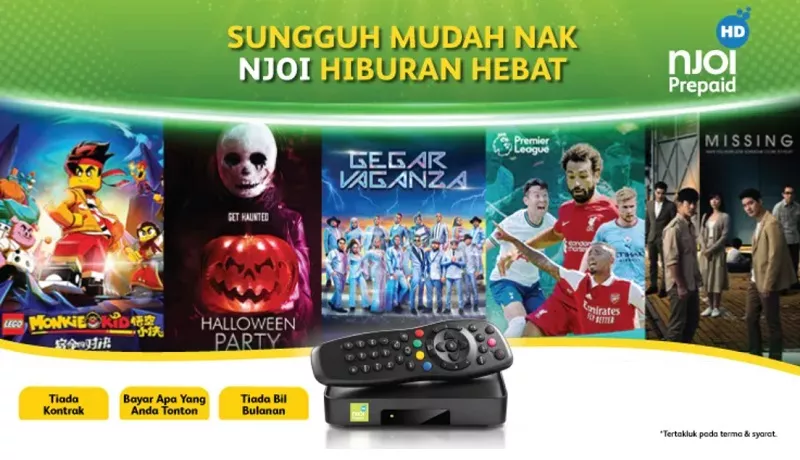
步骤一 |
步骤二 |
步骤三 |
选择配套然后提交您的申请。 |
等待安装。 |
享受您的新 Astro / 宽频! |
Astro 提供的免费卫星电视服务。终身收看娱乐,新闻,学习和资讯节目等。
图片仅供参考。
新的解码器,不包含卫星天线和电缆。您必须已安装 Astro/Njoi 卫星天线和电缆并正常运作。
包括安装。
新的解码器配有卫星天线和电缆。
包括安装。
签购
| Njoi Astro UniFi Maxis |
在这里找到您要的答案。
我们提供一站式服务为您申请Astro和Broadband。不必开车,排队和在销售柜台等候。 我们可以帮助您处理您的申请。
我们不收取额外费用。 无需提供信用卡信息。 费用与您在销售柜台申请的费用相同。
首先,您可以在线申请,我们将在工作时间内立即与您联系。 通过WhatsApp/电子邮件/传真发送您的身份证-IC(马来西亚公民)/ 护照(外国人)的复印件给我们。 收到所有资料后,我们将立即处理您的申请。
一旦收到您的完整资料,我们将在工作时间内立即处理您的申请。一旦您的申请获得批准,服务提供商的承包商将与您联系以进行安装预约。
ASTRO 和宽频收费同时在一张账单,享受更大的节省和无忧的账单支付。 在24个月的合约期内,您可以每月以折扣价享受 Astro 和宽频。
Astro 提供多种电视配套,包括娱乐、体育、电影和儿童配套。您可以选择符合您观看需求的配套,并在适用情况下添加额外的串流应用服务。
可以,您可以只订阅 Astro 电视配套而无需绑定宽频。不过,将 Astro 电视与光纤宽频绑定可享有更好的每月优惠,并且只需支付一张综合账单,更加方便。
对于小型家庭以及轻度上网和串流使用者,100Mbps 通常已足够。较大家庭、游戏玩家或重度串流用户则可选择 500Mbps 或 1Gbps 配套,以获得更流畅的多设备使用体验。
大多数 Astro 电视和光纤宽频配套都附带 24 个月合约期。如在合约期满前取消服务,可能会产生提前终止费用。
可以,您可在符合资格及覆盖范围的情况下随时升级电视配套或宽频速度。根据升级情况,可能需要重新计算合约期限。
您的每月账单将由 Astro 直接发出。您可通过电子邮件接收账单,或通过 Astro 账户在线查看。绑定配套用户将收到电视与宽频服务的综合账单。
付款方式包括网上银行、自动扣款、信用卡或 Astro 提供的其他认可付款渠道。我们的团队将在申请过程中为您提供协助。
如果您遇到任何服务中断问题,可联系 Astro 客户服务寻求技术协助。大多数情况下可远程解决,如有需要将安排技术人员上门处理。
可以,迁移服务需视新地址是否在服务覆盖范围内而定。根据您的配套,可能会产生迁移费用及合约调整。
不需要,提交申请时无需提供信用卡资料。服务获批后,付款安排将由 Astro 直接处理。
部分 Astro 电视配套可根据当前促销及服务情况添加串流服务等附加项目。可能需支付额外月费。
是的,光纤安装时通常会提供 WiFi 路由器。路由器型号可能会根据所选宽频速度配套而有所不同。
可以,我们会在处理您的申请前确认您地址的服务覆盖范围,以确保该地区可安装宽频服务。
马来西亚公民需提供 MyKad 复印件。外籍人士则需在提交宽频申请时提供护照复印件。
申请获批后,服务提供商通常会在 2 至 7 个工作日内联系您安排宽频安装预约。
大多数 Astro 宽频配套附带 24 个月合约期,从安装日期开始计算。如您搬迁,可能需要在新地址重新签订 24 个月合约。
可以,您可在新地址具备服务覆盖的情况下迁移宽频服务。合约期限可能会从新安装日期起重新计算 24 个月。
可以,您可申请在家中调整宽频设备位置。若属于非标准安装,可能会产生额外费用,并需在评估后直接支付给安装人员。
可以,您可转用 Astro 宽频。为避免服务中断,建议在终止现有宽频合约前先开通新的宽频服务。
标准安装在促销期间可能免费,但非标准安装(如设备迁移或复杂布线)可能会产生额外费用,并需直接支付给安装人员。
Service will be resumed after you make payment within 45 days. The monthly subscription fee to be prorated accordingly and a reconnection fee of up to RM20 (exclusive of SST) will be applied upon service resumption.
If payment is made within 45 days from your bill cycle date, Astro & Broadband services will be resumed within 3 hours of payment received. Your following month's bill will be prorated accordingly.
Find out more about the reconnection fee here.
STEP 1
Switch off the power of your box and make sure that the adapter’s power light is off.
STEP 2
Unplug the HDMI cable from your TV and plug it back in securely to other available HDMI port.
STEP 3
Switch on the power for your box and make sure that the adapter’s power light is on.
Please wait for 5 minutes.
STEP 4
Turn on your box. Do select the correct TV input.
You should no longer be experiencing this problem. 
Thank you for your interest in returning your Astro Box & Smart card/SIM card. By returning these items, you are playing your part in preserving our environment as we will refurbish the box and return it to circulation or recycle it.
All Astro box and smartcard/SIM cards are also property of Astro and as per our current T&Cs, customers are required to return them upon termination of Astro services.
Please provide your primary mobile number via My Astro Portal, or send it to one of our platforms found here.
Note:
Settlement of total outstanding balance is to be made prior to any of the request.
STEP 1
Press "HOME" button on your remote control.

STEP 2
Navigate to Settings and press "OK".

STEP 3
Navigate to Digital Audio and press "OK".

STEP 4
Choose your preferred selection and press “OK”.

STEP 5
Select Yes, continue and press "OK" to confirm on the changes.
Otherwise, select No, go back to cancel.

You can subscribe to new packs via
· Bill
· Log into your Astro Self-Service (location)
Astro GO+ is a service add-on that:
STEP 1
Press "HOME" button on your remote control.

STEP 2
Navigate to Settings and press "OK".

STEP 3
Navigate to Display and press "OK".

STEP 4
Navigate to Resolution and press "OK".

STEP 5
Navigate to your preferred selection and press “OK”.

STEP 6
Select Yes, continue and press "OK" to confirm on the changes.
Otherwise, select No, go back to cancel.


3. Click the Network Utility icon to open the Network Utility window.
4. For Ping Test, select the Ping tab and then type the address you'd like to ping in the text box. Click Ping and wait for the ping results.

5. For Traceroute Test, select the Traceroute tab and then type the address you like to traceroute in the text box. Click Trace and wait for the traceroute results.

1. Click the Search icon (magnifying glass) in the bottom left-hand corner and type "cmd" into the search bar.

2. Select the Command Prompt app - it will be at the top of the list of search results as the best match.

3. A black box with a flashing cursor will open; this is the Command Prompt.
For Ping Test, type "ping" and then hit the Space bar on your keyboard. Type in the address you like to ping and then hit the Enter key on your keyboard. Wait for the ping results.

For Traceroute Test, type "tracert" and then hit the Space bar on your keyboard. Type in the address you like to trace and then hit the Enter key on your keyboard. Wait for the tracert results.

1. Open the Start menu by clicking the Windows icon at the bottom left-hand corner of the screen.
2. Type "cmd" in the search bar at the bottom of the menu.
3. Click cmd found in the search results for Programs.

4. A black box with a flashing cursor will open; this is the Command Prompt.
For Ping Test, type "ping" and then hit the Space bar on your keyboard. Type in the address you like to ping and then hit the Enter key on your keyboard. Wait for the ping results.

For Traceroute Test, type "tracert" and then hit the Space bar on your keyboard. Type in the address you like to trace and then hit the Enter key on your keyboard. Wait for the traceroute results.

1. Move the mouse to the right-hand corner of the screen to make the vertical menu bar (charm bar) appear. Click Search.
2. Type "cmd" in the search bar and hit the Enter key on your keyboard.

3. Click cmd that found in the search results for Programs.
4. A black box with a flashing cursor will open; this is the Command Prompt.
For Ping Test, type "ping" and then hit the Space bar on your keyboard. Type in the address you like to ping and then hit the Enter key on your keyboard. Wait for the ping results.

For Traceroute Test, type "tracert" and then hit the Space bar on your keyboard. Type in the address you'd like to trace and then hit the Enter key on your keyboard. Wait for the traceroute results.

1. Click the Start button in the bottom left-hand corner of the screen.
2. Click the Run option in the right-hand column.

3. Type "cmd" in the text box and then hit the Enter key on your keyboard.

4. A black box with a flashing cursor will open; this is the Command Prompt.
For Ping Test, type "ping" and then hit the Space bar on your keyboard. Type in the address you'd like to ping and then hit the Enter key on your keyboard. Wait for the ping results.

For Traceroute Test, type "tracert" and then hit the Space bar on your keyboard. Type in the address you'd like to trace and then hit the Enter key on your keyboard. Wait for the tracert results.
Yes. You are entitled to separate Netflix accounts for each main Astro subscription e.g. If you have subscribed to Entertainment Plus, Platinum Pack, etc separately. Therefore, if you have more than one main Astro subscription with Netflix, you may choose to create multiple email addresses to activate each respective Netflix subscription. Please follow the steps provided to you via email/SMS in order to activate your Netflix subscriptions on the website.
No, there are no penalty fees for the Mesh WiFi devices should you wish to terminate Astro Fibre within/after 24 months.
Your bill statement will include details of your monthly subscription charges; e.g. charges for your chosen Astro packages and Broadband service. It will also show the time period of which your first bill will cover, as well as indicate how much the total charges are and when the payment due date is.
STEP 1
Please wait while your Astro box initializes.
STEP 2
Select your preferred language.
STEP 3
Navigate to Next and press "OK".
STEP 4
Select Auto as the Video Resolution.
STEP 5
Navigate to Next and press "OK".
STEP 6
Navigate to Confirm and press "OK" to confirm your selection if you are able to read the texts on screen properly.
Otherwise, navigate to Cancel to revert to the previous settings.
STEP 7
Select IPTV Plug & Play (self-install) as the box operating mode.
STEP 8
Navigate to Next and press "OK".
STEP 9
Select your preferred connection.
For connection via Wi-Fi, proceed to STEP 10.
For connection via LAN Cable, proceed to STEP 16 once you are connected.
STEP 10
Please wait while your Astro box searches for available Wi-Fi networks.
STEP 11
Navigate to your preferred Wi-Fi network and press "OK".
STEP 12
Please enter the password to connect to the Wi-Fi network.
STEP 13
Navigate to Done to continue.
STEP 14
Please wait while your Astro box connects to the internet.
STEP 15
Navigate to Yes to allow your Astro box to connect to this network automatically.
Otherwise, navigate to No.
Proceed to STEP 17 for the next step.
STEP 16
Navigate to Next and press "OK".
STEP 17
Your box's connection status will be displayed.
Navigate to Finish to complete the setup.
For TV packs only, 24-months contract commitment period. However, if in addition to the TV packs, if you would like to also sign-up for Broadband, the contract commitment will be 24 months as well. If you're an existing customer, your existing remaining contract duration (if any) will not be carried over to the new contract except for existing Disney+ Hotstar (3 Months Pack) and Multiroom subscription contract durations which will be carried over upon the migration to new packs.
Note: If you are subscribing to a bundle pack which includes Netflix or Disney+ Hotstar for the first time, you are required to maintain the respective app as part of your bundle selection for a minimum of 12 months, otherwise a cancellation fee will apply.
You will be charged 8% Service Tax on Astro Pay TV services rendered on or after 1st March 2024, whereas your Astro Fibre including Mesh will remain at 6% Service Tax.
Yes, however we do advise keeping your subscription while your TV is being fixed to avoid having to download the app again.
STEP 1
On your remote, press the “HOME” button and the home menu will be displayed at the bottom of your screen.
STEP 2
Navigate to SETTINGS and press “OK”.
STEP 3
Navigate to STB DIAGNOSTICS and press “OK”.

STEP 4
Refer to the signal strength % shown on the top left of your screen.

Yes, if a device is faulty due to customer's negligence, it is subject to a penalty fee for each device:
Disney+ Hotstar app is now available to Astro customers on the Ultra and Ulti Box will be able to enjoy the app on the big screen and stream all their favourite blockbuster movies from Hollywood to Hallyu and award-winning shows from Disney, Marvel, Star Wars, Pixar, National Geographic, FX and 20th Century Studios!
1. Ensure power cable is connected tightly.
2. Try to use another power socket / power source to eliminate faulty power sockets/ power sources which could cause the issue.

3. If the issue persists, submit your feedback form for further assistance.
You may report the incident on WhatsApp at 03-95433838 by typing PNP and our dedicated agents will attend to your matter. Please have your Airway Bill tracking numbers ready for validation.
If a replacement box/Astro SIM card is deemed necessary, a new Plug &Play Box and a new Astro SIM card will be couriered to your service address.
Customers subscribing to the following Astro packs will get to automatically enjoy Disney+ Hotstar as part of their newer, bigger and better packs
Customers with any of the above subscriptions with an Ultra or Ulti Box will also be able to enjoy Disney+ Hotstar on their big screen TV via their Astro Box, in addition to disneyplushotstar.my and the mobile app. Please click here on how to access Disney+ Hotstar on the Ultra/Ulti Box.
Astro customers who are not on the above Packs may upgrade to the Movies, Movies Plus, Premium 1, Premium 3 or Platinum Pack to receive access to Disney+ Hotstar at no additional cost. Alternatively, customers may visit www.astro.com.my/disney to subscribe to Disney+ Hotstar Premium through a 3-month plan via Astro at RM54.90 (NP: RM79.90 quarterly, Astro customer may see up to 30% savings in their Disney+ Hotstar Premium subscription)
For more information, please visit www.astro.com.my/disney. If you need further help, please WhatsApp “DH Help” to Astro or call them at 03-9543 3838 for assistance.
STEP 1
Check the internet connectivity by run the Test Connection.
Refer Run Test Connection.
STEP 2
Verify the average speedtest based on the Test Connection result.
a. Above 10Mbps - Proceed to STEP 5
b. Less then 10 Mbps - Proceed to STEP 3
Notes: Minimum 10 Mbps internet speed from box requires in order to get a stable connection.
STEP 3
Check the connection to the box either using Ethernet (LAN cable) or Wi-Fi.
a. If using Ethernet (LAN cable) - Connect to Live Agent for help.
b. If using Wi-Fi - Proceed to STEP 4
STEP 4
Check location of the decoder and router.
a. If nearby (within 1.5m) - Try connect to box from router using LAN cable.
b. If far (more than 1.5m) / No LAN cable - Proceed STEP 5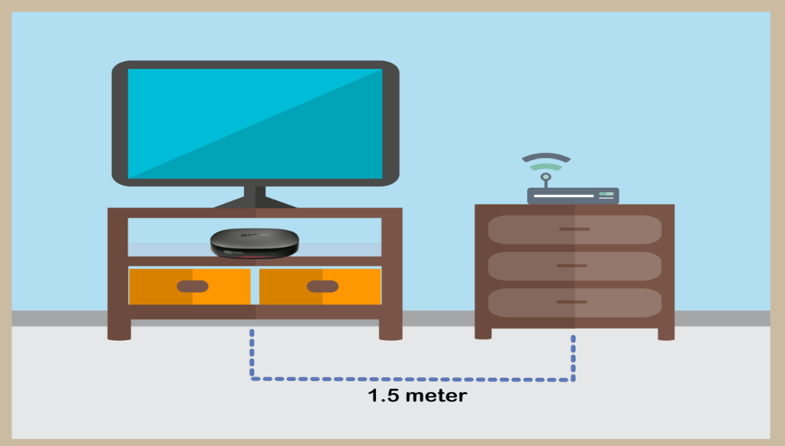
STEP 5
Reboot router, modem and decoder.
If issue persist, please try again after 30mins to 1 hour. Connect to live agent if persist after 30 mins to 1 hour.
STEP 1
Try to change channels on your Astro remote. Check the LED light.
If the LED is blinking 3 times or if it is not blinking, replace the batteries and proceed to STEP 2.
Otherwise, if the LED is blinking 1 time, your remote is working fine, let's proceed to STEP 3.
STEP 2
Check if you can change channels using your Astro remote control. You should no longer be experiencing this problem if is a battery issue.
If issue remain after batteries replacement, proceed to STEP 3.
STEP 3
You need to refresh the box setting manually from the box front panel.
Refer to Refresh Box setting (Clear NVRAM) - Ultra / Ulti Box.
If issue persist, please submit the issue on our Feedback Form.
No, your rewards cannot be transferred to another person or exchanged for cash.
The supported app platforms are iOS (requires iOS 13.0 or later), and Android (requires Android 8.1 or later), and all Harmony OS.
The supported web browser are Google Chrome, Safari, Mozilla Firefox, Microsoft Edge, Internet Explorer, Opera and other web browser.
No, Astro & Broadband only offers a 24-month contract period upon sign up.
Yes, switching package is allowed. However, switching package from Non-Deal to Deal bundle will refresh a new 24-month contract.
All Astro customers and non-customers who have an Astro ID will no longer be able to log in to our digital platforms using their usernames. Users will experience this change if they currently do not use an email address or mobile number to login, for example: johndoe2023.
The new packs come with 200 hours of Cloud recording by default. If your current recordings exceed 200 hours, the system will delete the exceeded hours once your package has been changed, starting with the oldest recordings first.
If you would like to retain the previous recordings which exceed 200 hours, you may opt for a selection of 400 or 1500 Cloud Recording hours at a chargeable rate of RM12 or RM15 per month (excl. govt tax) respectively. Or else, you may subscribe to the Platinum pack which comes with complimentary access to 1500 hours of Cloud Recording.

1. Please connect your computer or laptop to your Astro Fibre router using LAN cable. Your LAN cable must be connected from the yellow port of Astro Fibre router (Any available port).
2.Once connected, open any web browser such as Google Chrome, Internet Explorer, Mozilla Firefox and etc.
3. On the address bar, type http://192.168.100.254 and below page will appear.

Login using your username and password if you have changed the router login setting. Otherwise, your default router login is as per below.
Username: user
Password: user
4. Once you have successfully logged in, the router's web-based setup page will appear.

5. At the top of the page, click Wi-Fi to configure the WiFi parameters.

6. You may change the Wi-Fi Name and the Wi-Fi Password as per your preferences, then click "Apply".

7. Your Wi-Fi Name and password has been changed. Kindly ensure to reconnect your WiFi according your new WiFi name and password.
STEP 1
On your remote, press the HOME button and the home menu will be displayed on top of your screen.

STEP 2
Navigate to Settings.

STEP 3
Navigate to Remote Control Settings and press "OK".

STEP 4
Follow the steps appear on the screen to sync your Astro remote.

Not all shows/channels will be available on the Plug & Play Box as this depends on contractual rights with specific guidelines on the entitlement of these shows/channels and what you have as a part of your subscription.
Please be assured that we are continuously working hard to make more content available on the Plug & Play Box.
If you prefer to have all these channels, we recommend that you choose the Satellite dish option for the Ultra or Ulti Box.
Unavailable channels are as below:

For customers who wish to have their physical tax invoices reprinted, there will be a flat fee of RM10.00 levied as part of the process which has been implemented since year 2015.
Yes. As a Sports Pack customer, you will get access to Liga Malaysia as well as a variety of local and international sporting events as part of your subscription.
The Multiroom (Smart TV) will mirror the subscription entitlement as per your primary subscription. However, NHK World, Radio, Sky News channels and 3rd party apps such as Netflix, Disney+ Hotstar are not available via the Multiroom (Smart TV).
For any access related queries on Disney+ Hotstar, please call or WhatsApp "DH Help
Disney+ Hotstar is available on Chromecast (Gen 2 onwards, firmware 1.43 & above) and with the latest version of the Disney+ Hotstar app on iPhone, iPad and Android mobile.
Follow these instructions to cast your film/series:
Mesh WiFi network refers to a unified wireless network that is formed by utilizing inter-connected WiFi nodes (Mesh devices) placed throughout the house.
You can proceed with below BTS if the weather is good. Otherwise, you may try again later.
STEP 1
On your remote, press the HOME button and the home menu will be displayed on top of your screen.

STEP 2
Navigate to SETTINGS.

STEP 3
Navigate to Satellite Settings and press “OK”.

STEP 4
Navigate to Diagnostics and press “OK”.

STEP 5
Refer to the signal strength on your screen.
If it is 65 or higher, please take the screenshot and submit your feedback form.
If it is below 65, please go to Step 6.

STEP 6
Switch off the power for your box and make sure that the adapter’s power light is off.

STEP 7
Unscrew the satellite cable from the box and pull it out.

STEP 8
Plug the satellite cable back into the box and screw it back securely.

STEP 9
Switch on the power for your box and make sure that the adapter’s power light is on. Please wait for 5 minutes.

STEP 10
Turn on your box. You should no longer be experiencing this issue.
If issue persist, please submit the issue on our Feedback Form with error details and attach a picture of your General tab of the STB Diagnostics for assistance.
Centralized Dish
If issue persist under a centralized satellite dish, please refer to your respective Building Management before contacting our agents.
STEP 1
On your remote, press the HOME button and the home menu will be displayed on top of your screen.
STEP 2
Navigate to Settings.
STEP 3
Navigate to STB Diagnostics and press "OK".

STEP 4
Select Household Diagnostics and press "OK".

STEP 5
Details information of Household Diagnostics screen will be displayed.


1. Via Television
a) Ultra Box
• Press the “Home” button and scroll to “Settings” > “Wi-Fi/Ethernet” > “New Wi-Fi Connection”
• Allow the Ultra Box to scan the Wi-Fi networks available and subsequently choose your home Wi-Fi network > Enter your Wi-Fi password
• Once you are connected, your Home screen will now show “tabs” where you can now enjoy Video On Demand

o “Catch-up” missed episodes from ongoing programmes
o Binge-watch full seasons from “Boxsets”
o Choose the your favourites from “Movies”, “Kids” and more
2. Mobile/Portable devices
(a) Just head to the Google Play Store, Huawei App Gallery or Apple App Store here, search for “Astro GO” and download Astro GO on iOS and Android devices. Login to watch on demand and other ASTRO channels based on your subscription.
Your Astro account number is a 10-digit combination
E.g: 08XXXXXXXX
We would need you to run few tests in order for us to understand your issue and to assist you in fixing the problem.
This will not take longer than 15 minutes.
We need you to run the Speed Test using both WiFi connection and LAN cable.

4. Once you've gathered all the results, attach in Feedback Form for further assistance.
Quick Info
The recommended home internet speed for a smooth viewing is 10Mbps.
STEP 1
Switch OFF the power of your Ultra / Ulti box and make sure that the adapter's power light is off.

STEP 2
Switch ON the power of your Ultra / Ulti box and make sure that the adapter's power light is on.

STEP 3
On your remote control, press the standby button repeatedly until the Startup Options appear on TV.

STEP 4
Press "1".

STEP 5
Press "1".

STEP 6
The Software Update progress screen will appears.
The update will take 10 - 15 minutes to complete.
Please be patience.

For Platinum Pack and Multiroom Smart TV customers, Astro GO+ is included in your subscription at no extra charge. For customers on other packages, you will be able to add-on Astro GO+ to your subscription for RM 5.99/month.
Connect your Ultra Box/Ulti Box today and get the full value for your subscription. We believe we can provide you the best entertainment experience in Malaysia, and it all starts with connecting your box to the internet.
Want to enjoy these features for free?
STEP 1
On your remote, press the HOME button and the home menu will be displayed on top of your screen.

STEP 2
Navigate to Settings.

STEP 3
Scroll to Network Settings and press "OK". Select New Wi-Fi Connection and press "OK".


STEP 4
Select your Wi-Fi network and press "OK". Please enter the password to connect to your network.


STEP 5
You have successfully connected when this screen appears.