
A free satellite TV service from Astro. Watch lifetime entertainment, news, learning & information and more.
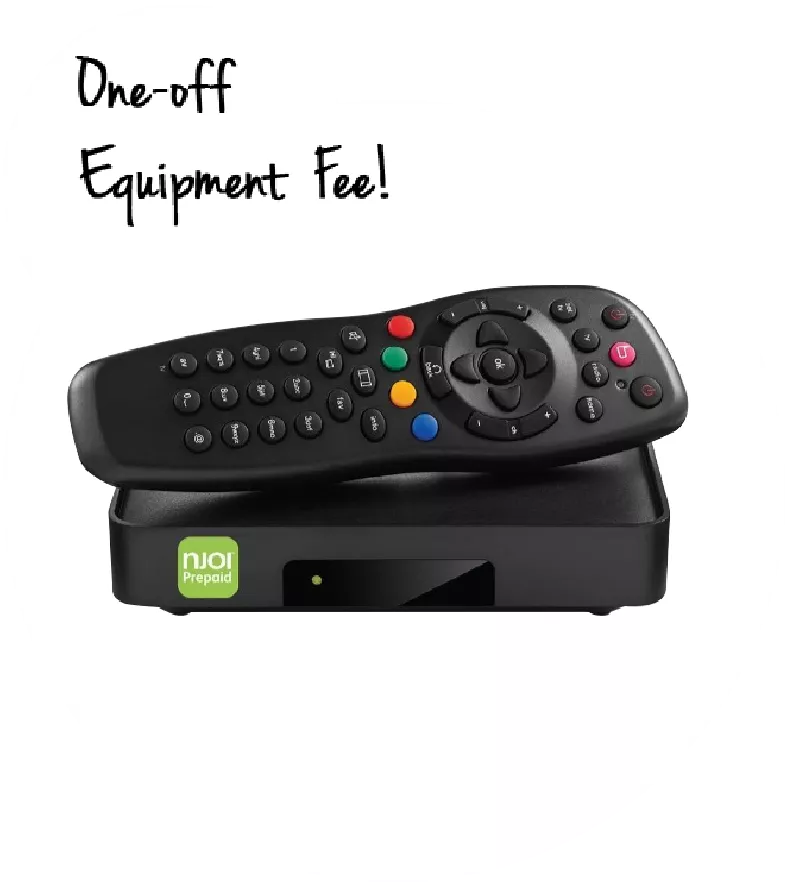
Pictures for illustration only.
Enjoy free access to 15+ TV channels & 10+ radio channels.
* Subject to Astro terms & conditions.


Step-1 |
Step-2 |
Step-3 |
Choose a plan & sign-up online. |
Sit back & wait for installation. |
Enjoy your new Astro / Broadband! |
A free satellite TV service from Astro. Watch lifetime entertainment, news, learning & information and more.
Pictures for illustration only.
New decoder only without satellite dish & cabling. You must have Astro/Njoi satellite dish and cable installed and working properly.
Including installation.
New decoder complete with satellite dish & cabling.
Including installation.
Applying for
| Njoi Astro UniFi Maxis |
Find your answers here.
We provide one stop service to apply Astro and Broadband for you.
You can avoid driving and queuing at the sales counter. We are the dealer that can help you to handle your application from the beginning to the end.
We do not charge you when you apply from us. There is no credit card information required to apply here. Charges are the same as you apply from the sales counter.
First, you can apply online, we will get back to you immediately during business hour. WhatsApp/Email/Fax us your Photocopy of IC (for malaysian) / Passport (for foreigners). When we receive all the information, we will proceed with your application immediately.
Once we receive your application with complete information, we will process your application immediately during business hour. The contractor from the service provider will then contact you for installation appointment once your application is approved.
Enjoy greater savings and hassle-free bill payment in one single bill for both Astro and Broadband. You get to enjoy Astro and Broadband at discounted price every month over the contract period of 24 months.
Astro offers multiple TV packs including Entertainment, Sports, Movies and Kids options. You can choose a pack that matches your viewing preferences and add optional streaming apps where available.
Yes, you may subscribe to Astro TV packs without bundling broadband. However, bundling Astro TV with Fibre Broadband may provide better monthly savings and convenience with a single bill.
For small households with light streaming and browsing, 100Mbps is usually sufficient. Larger families, gamers or heavy streamers may benefit from 500Mbps or 1Gbps plans for smoother performance across multiple devices.
Most Astro TV and Fibre broadband plans come with a 24-month contract. Early termination charges may apply if cancellation is made before the contract ends.
Yes, you may upgrade your TV pack or broadband speed at any time, subject to eligibility and coverage. A new contract period may apply depending on the upgrade.
Your monthly bill will be issued directly by Astro. You may receive it via email or access it through your Astro account. Bundled customers will receive a single combined bill for TV and broadband services.
Payment methods may include online banking, auto debit, credit card or other approved payment channels provided by Astro. Our team can guide you during the registration process.
If you experience any service interruption, you may contact Astro customer support for technical assistance. In many cases, issues can be resolved remotely or a technician will be arranged if necessary.
Yes, relocation is subject to service availability at your new address. Relocation charges and contract adjustments may apply depending on your plan.
No, you do not need a credit card to submit your application. Payment setup will be arranged directly with Astro after your service is approved.
Selected Astro TV packs allow optional add-ons such as streaming services depending on current promotions and availability. Additional monthly charges may apply.
Yes, a WiFi router is typically provided during fibre installation. The router model may vary depending on the selected broadband speed plan.
Yes, we will check the service coverage at your address before proceeding with your application to ensure broadband is available at your location.
For Malaysians, please provide a copy of your MyKad. For foreigners, provide a copy of your passport when submitting your broadband application.
After your application is approved, the service provider typically contacts you within 2 to 7 working days to arrange the broadband installation appointment.
Most Astro Broadband plans come with a 24-month contract starting from your installation date. If you relocate, a new 24-month contract may apply at your new address.
Yes, you can relocate your broadband service, subject to service availability at the new address. Your contract may reset for another 24 months from the new installation date.
Yes, you may request to relocate broadband devices within your home. Non-standard installation charges may apply and are payable to the installer directly after assessment.
Yes, you can switch to Astro Broadband. To avoid service interruption, it is recommended to activate the new service before terminating your current broadband contract.
Standard installations may be free during promotions, but non-standard installations (e.g., device relocation or complex wiring) may incur extra charges payable directly to the installer.
Please ensure that you have subscribed to the mentioned channel.
If you're subscribed to this channel, follow below steps.
STEP 1
You need to refresh the signal on your box.
Refer to Refresh signal of your box guide.
STEP 2
If issue persist after 30 minutes, proceed to submit report via WhatsApp or Feedback Form.
Your account number will be used to identify/verify you for all After Sales-Services. You may also use your mobile number/ Astro smart card number/ NRIC number or Astro Box number.
STEP 1
Switch off the power for your box and make sure that the adapter's power light is off.

STEP 2
Locate the Smartcard at the front or right side and gently pull it out make sure that the adapter's power light is off.

STEP 3
Wipe the Smartcard's gold chip clean using a dry soft cloth.

STEP 4
Make sure the gold chip is facing upwards and reinsert it all the way in.

STEP 5
Switch on the power for your box and make sure that the adapter's power light is on. Please wait for 5 minutes.

STEP 6
Turn on your box. You should no longer be experiencing this problem.
If issue persist, please submit the issue in our Feedback Form and attach a picture of your General tab of the STB Diagnostics for assistance.

Starting 29th April 2025 onwards, the Sun NXT app will be available on the Ultra/Ulti Box for all Astro customers to enjoy on the big screen, web app or/and mobile app.
Service Tax is charged based on the date the service is rendered. For services rendered on or after 1st March 2024, the Service Tax rate would be at 8% whilst for services enjoyed before 1st March 2024, the Service Tax rate would be 6%.
STEP 1
On your remote, press the Home button and the home menu will be displayed on your screen.

STEP 2
Navigate to Profile.

STEP 3
The Profile Selection Screen will be displayed.

STEP 4
Navigate to Edit Profile.

STEP 5
Choose a profile to edit.

STEP 6
Navigate to Name.

STEP 7
Enter your new Profile Name, navigate to DONE and press "OK".

STEP 8
Your new profile name will be shown in the Profile Selection Screen.

No, the Service Tax is a tax payable entirely to the Government. Astro acts as a collection agent for the Government.
For customers with Entertainment Plus, Movies Plus, Sports Plus, Premium 2, Premium 3, and Platinum Pack
For Non-Entertainment Plus, Premium 2, Premium 3, and Platinum Pack Pack customers (New Netflix customers)
Note: The Netflix plan will be defaulted to Premium, you may select ‘Change Plan’ to choose the ‘Standard’ plan.
For Non-Entertainment Plus Pack, Premium 2, Premium 3, and Platinum Pack customers (Existing Netflix customers)


The default login of the router as below. If you have done a configuration on your router previously, the password may be different.
Username: user
Password: Router S/N (Available on the sticker at the back of the router)
4. Once you have successfully login, the router's web-based setup page will appear. Please follow below steps for the configuration.

5. From the left menu, choose Wireless 2.4GHz and then click Basic Settings tab on the left menu to access to below screen.

6. You may change the Wireless Network Name (SSID) and the SSID Password to follow your preferences, then click "Save" for the changes to take place.
Please reconnect to the new wireless name with the new password once completed.
7. Since this is a dual band router, you will have 2 Wireless Network Names (SSID) i.e. 2.4GHz and 5GHz. You may connect to any of the SSID, preferably with a stronger signal available.
You may change the Wireless Network Name (SSID) and the SSID Password to follow your preferences for 5GHz by choosing Wireless 5GHz then click Basic Settings.
Click "Save" for the changes to take place and reconnect to the new wireless name with the new password once completed.

STEP 1
On your remote, press the HOME button and the home menu will be displayed on top of your screen.

STEP 2
Navigate to Settings.

STEP 3
Navigate to Master PIN and press “OK”.

STEP 4
Please enter your PIN (Default PIN is 0000).

STEP 5
Please enter your new PIN.

STEP 6
Please re-enter your new PIN to confirm.

STEP 7
Your PIN successfully changed when this screen appears.

Please perform the following checks and troubleshooting steps:
1. Check if your TV supports the Astro app.
The Astro app is generally available on selected:
Kindly check that your Smart TV supports the Astro Smart TV app (kindly refer here).
If your TV uses a different operating system (e.g., older proprietary OS), the Astro app may not be available.
2. Update your TV software.
Go to: Settings → Support → Software Update
Install any available updates, then restart the TV and try again.
3. Search the correct app store.
Search for "Astro" or "Astro GO" (depending on your region and service availability).
4. If your TV's region is set incorrectly, certain apps may not appear.
Look under: Settings → General → Location/Region
Ensure it matches your actual country.
If you are still having issues, proceed to submit report via WhatsApp or Feedback Form and provide:
This will help our support team investigate and assist you further.
f you decide to switch your existing Asian Favourites selection to Viu Premium, your current
selection will no longer be valid. This means that you will no longer be able to access any
channels or apps that is part of your current selection.
However, if you wish to remain with your existing Asian Favourites selection and enjoy Viu
Premium, please refer to Q8.
STEP 1
Press "HOME" button on your remote control.

STEP 2
Navigate to Settings and press "OK".

STEP 3
Navigate to Display and press "OK".

STEP 4
Navigate to Resolution and press "OK".

STEP 5
Navigate to your preferred selection and press “OK”.

STEP 6
Select Yes, continue and press "OK" to confirm on the changes.
Otherwise, select No, go back to cancel.

To check your contract, please visit My Astro.
Astro X3’s no-contract option is part of our upcoming offering to give customers greater flexibility and control over their viewing experience.
It is designed with simplicity and ease in mind—allowing customers to sign up, pause, or cancel at any time. More details on how it works and what’s included will be shared soon.
Stay tuned for updates!
If you are interested to subscribe to Sun NXT via Astro, please click here or reach out to us via WhatsApp by typing “Hi” at 03-9543 3838.
Kindly refer to the steps below to log in:
STEP 1
Click on the Disney+ app logo under the Apps rail on your Home page

STEP 2
Select Log In

STEP 3
Scan the QR code or visit the website on screen to log in

STEP 4
Key in the on-screen code to pair your TV

STEP 5
Enter your email address or mobile number associated with your Disney+ subscription

STEP 6
Select whether you want your OTP to be sent to your email address or mobile number

STEP 7
Key in your OTP

STEP 8
Review and agree to the Disney+ terms
Only applicable to first time log in to Disney+ after the app migration

STEP 9
Create your user profiles
Only applicable to first time log in to Disney+ after the app migration


STEP 10
Select your user profile on your TV screen to start watching


To purchase Astro First easily, you can do it through My Astro. Here's how:
1. Download the My Astro app or visit My Astro web
2. Login using your Astro ID
3. Go to Astro Store > Astro First section
4. Select your preferred movie and click on rent
5. When your rental is confirmed, you will see details on which channel that you can watch your movie
Purchase via WhatsApp
Purchase via SMS
*SMS service is available for Maxis, Celcom, Digi and U Mobile only.
From Beyond PVR On Demand interface:
From Ultra/Ulti On Demand interface:
From Astro Go app (purchases only applicable for Android devices):
*The default pin code is 0000 if you have not pre-set it.
🎁 Want to buy Astro First movies faster & track your rentals?
📱 Download the My Astro app to:
- Browse Astro First titles
- Rent in 1 tap
- Get reminders when new movies launch
If you're facing this kind of suspicious activity on your account, please report it to our customer service immediately at 03-9543 3838.
Real-time payments are posted almost instantaneously. However, daily system maintenance occurs between 12AM to 3AM - any payment made during this period will be delayed until system maintenance is complete.
You may register for auto-debit via:
1. My Astro website.

2. My Astro App

3.Any of our Astro Experience Store.
1. Open/Download the My Astro app or visit My Astro web.

2. Login with your Astro ID.
3. Go to Account.

4. Select 'Profile'.

5. Under Mobile number, tap on the edit icon.

6. Select your verification method. The OTP will be sent to your registered mobile number or email address.

7. Enter the 6-digit One Time Pin and tap 'Verify'.

8. Enter the new mobile number and tap 'Next'.

9. Enter the One Time Pin sent to the new number and tap 'Verify'.

10. A successful notification will be displayed.

Yes, you can log in using the same email address or mobile number associated with your existing Disney+ subscription.
As an existing customer, you will notice some changes after migrating to the new Disney+ app as some personalised viewing data, such as profiles, viewing activity, downloads and app preferences, will not be migrated.
Therefore, you will need to set up your profiles and preferences again when you first start using the new Disney+ app.
For further enquiries regarding the Disney+ app migration, new Disney+ app experience and app-related features, please visit the Disney+ Help Centre.
STEP 1
Press "HOME" button on your remote control.

STEP 2
Navigate to Update Satellite Frequency and press “OK”.

STEP 3
Choose Reprogramming and press “OK”.

STEP 4
Select Yes, continue and press "OK" to proceed with the update.
Otherwise, select No, go back to cancel.

STEP 5
Satellite Frequency Update progress screen will be displayed.

STEP 6
The test result will be displayed once completed.
Press "OK" to go back to channel.

This initiative is part of Astro’s “GO GREEN” journey, which was implemented to promote paperless billing and to play our part in protecting the environment. The objective of the Paper Bill Charge is to encourage our customers to opt for e-Billing as their preferred Bill Delivery Method, which is also a more convenient and efficient way to access and manage their bills. Hence, a fixed RM10.00 monthly charge will be applied to all existing and new Astro customers who opt for Paper Bills as their preferred bill delivery method.


4. Once you have successfully login, the router's web-based setup page will appear. Please follow below steps for the configuration.

5. From the top menu, choose Basic and then click Wireless tab on the left menu to access to below screen.

6. Since this is a dual band router, you will have 2 Wireless Network Names (SSID) i.e. 2.4GHz and 5GHz. You may connect to any of the SSID, preferably with a stronger signal available.
7. You may change the Wireless Network Name (SSID) and the Password to follow your preferences, then click "Save" for the changes to take place.
Please reconnect to the new wireless name with the new password once completed.
Yes, your advance payment will be fully refunded if you cancel your subscription before the Astro box installation. Please WhatsApp "Hi" to us at 03-9543 3838. Then select Billing Services, provide your IC number if requested, and choose Refund Request.
The refund process will take approximately 14 days for processing with your issuing bank.
However, if you decide to cancel your subscription after the Astro box installation (during your contract period), a prorated early termination fee will apply.
Yes, you can return the Astro Box & Smart Card/SIM Card even after being charged for the box fee. After successfully returning the box, Astro will proceed to refund the box fee within 30 days from the confirmation date of the returned items to our Astro warehouse.
Existing Netflix add-on customers will be notified prior to their next bill cycle via email.
STEP 1
On your remote, press the HOME button and the home menu will be displayed on top of your screen.

STEP 2
Navigate to Settings.

STEP 3
Navigate to STB Diagnostics and press "OK".

STEP 4
Select General Diagnostics and press "OK".

STEP 5
Details information of General Diagnostics screen will be displayed.

STEP 6
Press down arrow on your remote to get more information.


When Band Steering is enabled, only one SSID network name with one password is available. Example:
i. SSID: SSID, Password: 12345678
Please upgrade the Ultra/Ulti Box software to enjoy Netflix on your Ultra/Ulti Box. To do this, please click on the Netflix app icon on the homepage or go to CH741 to prompt the software upgrade. Kindly click Install when the software upgrade prompt appears. This will take approximately 20 minutes and you would be able to launch Netflix on the Ultra/Ulti Box after that.
Yes, you can. On your Account page and go to Profile. Click edit on Service address to change your address details. You may also request for installation assistance if it's required for the new address.
Download My Astro app or visit the My Astro website.

You can proceed with below BTS if the weather is good. Otherwise, you may try again later.
STEP 1
On your remote, press the HOME button and the home menu will be displayed on top of your screen.

STEP 2
Navigate to SETTINGS.

STEP 3
Navigate to Satellite Settings and press “OK”.

STEP 4
Navigate to Diagnostics and press “OK”.

STEP 5
Refer to the signal strength on your screen.
If it is 65 or higher, please take the screenshot and submit your feedback form.
If it is below 65, please go to Step 6.

STEP 6
Switch off the power for your box and make sure that the adapter’s power light is off.

STEP 7
Unscrew the satellite cable from the box and pull it out.

STEP 8
Plug the satellite cable back into the box and screw it back securely.

STEP 9
Switch on the power for your box and make sure that the adapter’s power light is on. Please wait for 5 minutes.

STEP 10
Turn on your box. You should no longer be experiencing this issue.
If issue persist, please submit the issue on our Feedback Form with error details and attach a picture of your General tab of the STB Diagnostics for assistance.
Centralized Dish
If issue persist under a centralized satellite dish, please refer to your respective Building Management before contacting our agents.

STEP 1
On your remote, press the HOME button and the home menu will be displayed on top of your screen.

STEP 2
Navigate to Settings.

STEP 3
Navigate to Menu Language and press "OK".

STEP 4
Navigate to your preferred language selection and press “OK”.

We’re sorry to hear that you’ve decided to leave us, and we truly appreciate your time with Astro.
If you wish to proceed with terminating your account, we understand your decision. However, please ensure there is no outstanding balance and that your contract period has ended. You may then contact our Customer Service at 03-9543 3838, from 9:00 AM – 6:00 PM, Monday to Saturday (exl Public Holidays). Our team will assist you with your request.
Kindly follow these simple steps:
Alternatively, you may submit your request via our Feedback Form.
Astro X3 packs offer a new way to enjoy Astro — without the need for a set-top box or satellite dish, giving you a simpler and more flexible way to watch your favourite content. With no box required, you can start streaming your favourite entertainment shows and live sports instantly via the Astro app on selected Smart TVs and personal devices such as smartphones, tablets, and laptops — anytime, anywhere. And with just a 12-month contract, these plans offer greater flexibility while delivering the same breadth of content you enjoy with Astro.
You can choose from two flexible 12-month options, depending on your viewing preferences:
*No-contract options will be available from December 2026.
If you are an Astro subscriber
Step 1: Launch the Astro Smart TV app on your Smart TV.
Step 2: Select “Log In”.

Step 3: Scan the QR code OR visit astro.com.my/tvapp and enter the code on the screen.

Step 4: Enter your Astro ID (registered email or mobile number) and password. If you do not have an Astro ID, click on “Create now”.

Step 5: Once you have successfully logged in, the Astro Smart TV app will refresh automatically, and you will be able to access it.
If you are NOT an Astro subscriber
Step 1: Launch the Astro Smart TV app on your Smart TV.
Step 2: Select “Subscribe Now”.

Step 3: Scan the QR code to visit https://www.astro.com.my/#main and explore Astro’s packs or Multiroom (Smart TV).

Step 4: Once you have successfully subscribed, kindly follow Step 1 – 5 under “If you are an Astro subscriber” to log in.
Starting 16 February 2024, you may be asked to perform Astro ID verification when you log in to their Astro account on digital platforms such as www.astro.com.my, Astro GO, My Astro etc. This 2-step process encompasses verifying your email address or phone number and re-entering of your existing password.
Yes, the current service tax law does not exempt services provided to customers residing in Labuan, Langkawi, and Tioman.
All Astro equipment is property of Astro and as per our current Terms and & Conditions, customers are required to return them upon termination of Astro services.
Successful payment via JomPAY will be posted real time.
There will be no automatic migration. Customers will continue with their existing Astro plans as usual and may choose to subscribe to Astro X3 separately if they wish.
Please check if you are streaming on a supported device. Astro GO is only applicable within the supported platforms; mobile devices (phones and tablets) and web browsers.
If you are still having issues, proceed to submit report via WhatsApp or Feedback Form.
You can reschedule the collection appointment by calling our courier agent/installer directly.
Yes, you can activate your access anytime between April 24, 2025, and June 23, 2025, to get 2 months of access to Prime Video at no additional charge. Please note that the offer is subject to change. All sign-ups are also subject to the Prime Video app usage terms and conditions.
Please ensure that your Ultra or Ulti Box is set as the primary (main) decoder to enjoy 2 months of access to Prime Video at no additional charge.
If your primary box is an older model, don’t worry as you can still enjoy this offer by upgrading to an Ultra/Ulti Box within the offer period. Just contact us to arrange your upgrade.
STEP 1
On your remote, press the ... button and the Channel Guide page will be displayed on your screen.

STEP 2
Select the channel you would like to unlock and press "OK".

STEP 3
Select "Unlock Channel" and press "OK".

STEP 4
Enter the PIN to unblock the channel.

STEP 5
You are successfully unlocked the channel when this screen appears.

Yes, another person may register their credit card to your account's auto-debit facility. If you are performing this action via our call centre, the respective card holder is required to be present.
1. Please ensure your modem and router power plugs are securely connected to the power socket.

2. Alternatively, try to connect the power plug to a different power socket or power source. This step is to eliminate the possibility of faulty power socket which could cause the issue.

3. If issue persists, submit your Feedback Form for further assistance.