
A free satellite TV service from Astro. Watch lifetime entertainment, news, learning & information and more.
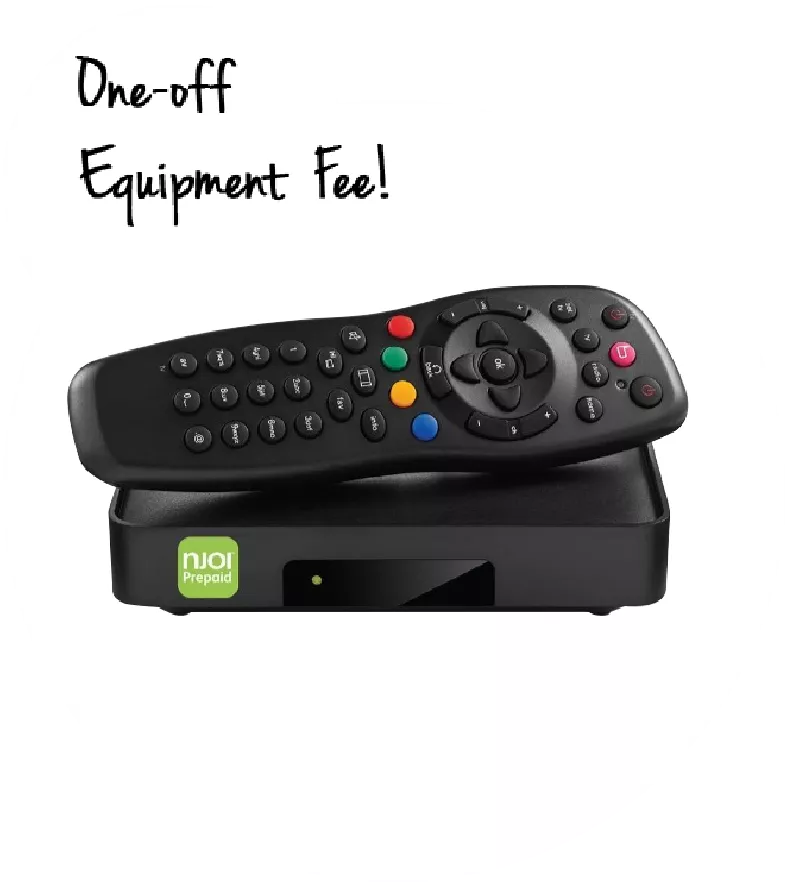
Pictures for illustration only.
Enjoy free access to 15+ TV channels & 10+ radio channels.
* Subject to Astro terms & conditions.


Step-1 |
Step-2 |
Step-3 |
Choose a plan & sign-up online. |
Sit back & wait for installation. |
Enjoy your new Astro / Broadband! |
A free satellite TV service from Astro. Watch lifetime entertainment, news, learning & information and more.
Pictures for illustration only.
New decoder only without satellite dish & cabling. You must have Astro/Njoi satellite dish and cable installed and working properly.
Including installation.
New decoder complete with satellite dish & cabling.
Including installation.
Applying for
| Njoi Astro UniFi Maxis |
Find your answers here.
We provide one stop service to apply Astro and Broadband for you.
You can avoid driving and queuing at the sales counter. We are the dealer that can help you to handle your application from the beginning to the end.
We do not charge you when you apply from us. There is no credit card information required to apply here. Charges are the same as you apply from the sales counter.
First, you can apply online, we will get back to you immediately during business hour. WhatsApp/Email/Fax us your Photocopy of IC (for malaysian) / Passport (for foreigners). When we receive all the information, we will proceed with your application immediately.
Once we receive your application with complete information, we will process your application immediately during business hour. The contractor from the service provider will then contact you for installation appointment once your application is approved.
Enjoy greater savings and hassle-free bill payment in one single bill for both Astro and Broadband. You get to enjoy Astro and Broadband at discounted price every month over the contract period of 24 months.
Astro offers multiple TV packs including Entertainment, Sports, Movies and Kids options. You can choose a pack that matches your viewing preferences and add optional streaming apps where available.
Yes, you may subscribe to Astro TV packs without bundling broadband. However, bundling Astro TV with Fibre Broadband may provide better monthly savings and convenience with a single bill.
For small households with light streaming and browsing, 100Mbps is usually sufficient. Larger families, gamers or heavy streamers may benefit from 500Mbps or 1Gbps plans for smoother performance across multiple devices.
Most Astro TV and Fibre broadband plans come with a 24-month contract. Early termination charges may apply if cancellation is made before the contract ends.
Yes, you may upgrade your TV pack or broadband speed at any time, subject to eligibility and coverage. A new contract period may apply depending on the upgrade.
Your monthly bill will be issued directly by Astro. You may receive it via email or access it through your Astro account. Bundled customers will receive a single combined bill for TV and broadband services.
Payment methods may include online banking, auto debit, credit card or other approved payment channels provided by Astro. Our team can guide you during the registration process.
If you experience any service interruption, you may contact Astro customer support for technical assistance. In many cases, issues can be resolved remotely or a technician will be arranged if necessary.
Yes, relocation is subject to service availability at your new address. Relocation charges and contract adjustments may apply depending on your plan.
No, you do not need a credit card to submit your application. Payment setup will be arranged directly with Astro after your service is approved.
Selected Astro TV packs allow optional add-ons such as streaming services depending on current promotions and availability. Additional monthly charges may apply.
Yes, a WiFi router is typically provided during fibre installation. The router model may vary depending on the selected broadband speed plan.
Yes, we will check the service coverage at your address before proceeding with your application to ensure broadband is available at your location.
For Malaysians, please provide a copy of your MyKad. For foreigners, provide a copy of your passport when submitting your broadband application.
After your application is approved, the service provider typically contacts you within 2 to 7 working days to arrange the broadband installation appointment.
Most Astro Broadband plans come with a 24-month contract starting from your installation date. If you relocate, a new 24-month contract may apply at your new address.
Yes, you can relocate your broadband service, subject to service availability at the new address. Your contract may reset for another 24 months from the new installation date.
Yes, you may request to relocate broadband devices within your home. Non-standard installation charges may apply and are payable to the installer directly after assessment.
Yes, you can switch to Astro Broadband. To avoid service interruption, it is recommended to activate the new service before terminating your current broadband contract.
Standard installations may be free during promotions, but non-standard installations (e.g., device relocation or complex wiring) may incur extra charges payable directly to the installer.
Please make sure that:
To find out which Astro ID is currently linked to your account, you may submit a feedback form. Kindly select feedback type "I have an enquiry/issue with Apps
The main changes are the revamped look and feel of the user interface on the Smart TV App, which include redesigns to the Astro interface that consists of title rows at the Home Page to feature popular franchises, new live programmes posters and changes to the menu bar for easier navigation.
For more info, please read our dedicated FAQ on this here.
In addition, we have also recently introduced a new look to the Title Information Page and the ability to disable the Profile Selection Screen. For more information, please click here.
You can now choose to log in using your email address, mobile number or a social account (Facebook, Google or Apple).
You will need to have an Astro subscription before you can subscribe to Disney+ Hotstar as an add-on service via Astro or enjoy any Astro bundle promotions. Please click here to subscribe to our Movies, Premium 1, Premium 3 or Platinum Pack to enjoy all your favourite Global and Malaysian hits for even better value and savings!
Service will resume within 3 hours after payment is made.
STEP 1
Press "HOME" button on your remote control.

STEP 2
Navigate to Update Satellite Frequency and press “OK”.

STEP 3
Choose Reprogramming and press “OK”.

STEP 4
Select Yes, continue and press "OK" to proceed with the update.
Otherwise, select No, go back to cancel.

STEP 5
Satellite Frequency Update progress screen will be displayed.

STEP 6
The test result will be displayed once completed.
Press "OK" to go back to channel.

Further details on pricing, billing and availability will be confirmed in coming months. Look out for more details and register your interest via https://astro.com.my/Netflix
You may switch to E-mail Billing or Paper bills to be notified of your bill and make payment. Kindly note that if you select to have Paper Bills, you will be charged a RM10 fee per bill.
In the new bill layout, there are three tax indicators for customer to refer: S1 (8%), S2 (6%), and N (non-taxable item). Each item list will be marked in accordance with the tax indicator below:
To allow customers to decide on their WiFi connection arrangement based on their preference upon being advised by the installer on-site.
User to manually connect their devices to different WiFi bands based on their usage and preference.
Please ensure to put your box on standby mode to refresh the signal.
a. Using IVR
1. Dial 03-95433838 and select you preferred language.
2. Select Account Related.
3. Select Technical Assistance.
4. Select Refresh Smartcard.
b. Using MyAstro web
STEP 1
Go to https://myastro.astro.com.my/ in your web browser.
STEP 2
Key-in your Email / Mobile number and password. Then, press LOG IN.
STEP 3
Click on TV pack.
STEP 4
Choose Main Room for the Primary Box; else choose Multiroom (If any).
STEP 5
Click on "Refresh" to refresh signal on your box.
For Main Box
For Multiroom
STEP 6
After tap the Refresh, below notification will be displayed as below.
For Main Box
For Multiroom
c. Using MyAstro App
STEP 1
Open myAstro App and click "Login".
STEP 2
Key-in your Email / Mobile number and password. Then, press "LOG IN".
STEP 3
Go to "Account".
STEP 4
Scroll down to "TV pack" and click on it.
STEP 5
Choose Main Room for the Main Box; else choose Multiroom (If any).
STEP 6
Tap on "Refresh" to refresh signal on your box.
For Main Box
For Multiroom
STEP 7
After tap the Refresh, below notification will be displayed as below.
For Main Room
For Multiroom
Surcharge is imposed by 3rd party payment collection partners for services rendered. Kindly note that customers may be charged a surcharge per transaction when bill payments are made via the following methods:-
Bill payments at selected petrol stations, convenience stores, retail/mobile shops, kiosk, and e-wallets may incur a surcharge of up to RM0.50 per transaction by the appointed collection agencies of RMS (formerly known as Razer/MOL), ATX, MobilityOne, and e-Pay.
· To find out more on how to make your bill payments, click here.
Purchase function on Astro GO is only available for Android devices, Huawei devices and on the Astro GO website. For Apple device users, please head to astrogo.astro.com.my to make your purchase.
Purchase instruction:
Head to the Store section

Click on RENT

Enter Your PIN (Default PIN 0000)

Confirm to Purchase

Purchased Success. Enjoy!

You purchased content title will be available under "Rental" in My Library. All purchases on Astro GO will be added to your monthly bill and accessible on both Astro GO and your Astro decoder. Cancellation of purchase is not possible upon confirmation.
*Purchase of content is only available on Android & Huawei devices and on the Astro GO website*
The supported app platforms are iOS (requires iOS 13.0 or later), and Android (requires Android 8.1 or later), and all Harmony OS.
The supported web browser are Google Chrome, Safari, Mozilla Firefox, Microsoft Edge, Internet Explorer, Opera and other web browser.
The service tax rate for Astro Pay TV will be increased from 6% to 8%. The service tax for Astro Fibre, which falls under the category of telecommunication service, will remain at 6%.
There are no extra charges as it is a value-added service introduced provided for your convenience.
You may click here to Login and proceed to secure your Astro ID by linking it to your Astro account. If you do not have an Astro ID, please follow the steps in below to create one. You may also choose to log in or create Astro ID with your social accounts (eg. Facebook, Google and Apple).


The WiFi SSID and password of the Mesh unit will be automatically synchronized to the WiFi router. Hence, there is no need to configure the WiFi parameters.
*WiFi SSID (Service Set Identifier) is the name of your wireless network, also known as Network ID. It is viewable to anyone with a wireless device within reachable distance of your network.
You can make changes to your Netflix plans that are included in your Bundle through My Astro app
You can change your non Astro-bundled a-la carte Netflix plan at any time by signing into Netflix.com and visiting the Account page, then selecting Change Plan to view and select available plans.
STEP 1
Switch OFF the power of your Ultra / Ulti box and make sure that the adapter's power light is off.

STEP 2
Switch ON the power of your Ultra / Ulti box and make sure that the adapter's power light is on.

STEP 3
Put the box on standby mode.

STEP 4
Press and hold the Home button on the box.

STEP 5
Wait until "boot" appear on the front panel and released.

STEP 6
When “boot” appears, press “Standby”, “Left “, “Up” continuously until Auto Update appear on box screen and Software Update progress on TV.


STEP 1
Switch OFF the power of your box and make sure that the adapter's power light is off.
STEP 2
Switch ON the power of your box and make sure that the adapter's power light is on.
STEP 3
Press Standby, Ch+, Standby keys on the box simultaneously when the "boot" message appears on the box front panel.
The Software Update progress screen will appears.
The update will take 10 - 15 minutes to complete. Please be patience.


STEP 1
Switch OFF the power of your box and make sure that the adapter's power light is off.
STEP 2
Switch ON the power of your box and make sure that the adapter's power light is on.
STEP 3
Press the standby button repeatedly after switch on the power.

STEP 4
Press "OK".

STEP 5
The Software Update progress screen will appears.
The update will take 10 - 15 minutes to complete.
Please be patience.

Yes, you can go to "Account' and scroll to "Subscription' and select TV pack. You may reach out to us via WhatsApp at 03-9543 3838 for more details.
For more information about the Astro Fibre App, you may click here for a detailed user guide.
Not to worry, our representative will be contacting you within 24 hours.
If you did not receive the recovery email or verification code, please make sure that:
To find out which email or phone number you have used to register your Astro ID, you may submit a feedback form. Kindly select feedback type "I have an enquiry/issue with Apps" choose "Astro GO"

We will get in touch with you within 48 hours to solve your enquirie
Please follow the steps below to verify your Astro ID:

For customers that would like to subscribe to Multiroom with a box installation,
(i) customers on the old packages (example Family Pack, Starter Pack, Value Pack, Super Pack or Super Pack Plus) will have to subscribe to our new packages first by sending "Switch" to 03-9543 3838 via WhatsApp;
(ii) customers on the new Astro packages can subscribe by visiting product.astro.com.my/multiroom or WhatsApp "Hi" to 03-9543 3838.
The new packs come with 200 hours of Cloud recording by default. If your current recordings exceed 200 hours, the system will delete the exceeded hours once your package has been changed, starting with the oldest recordings first.
If you would like to retain the previous recordings which exceed 200 hours, you may opt for a selection of 400 or 1500 Cloud Recording hours at a chargeable rate of RM12 or RM15 per month (excl. govt tax) respectively. Or else, you may subscribe to the Platinum pack which comes with complimentary access to 1500 hours of Cloud Recording.
You can proceed with below troubleshooting if the weather is good. Ortherwise, you may try again later.
STEP 1
On your remote, press the “HOME” button and the home menu will be displayed at the bottom of your screen.
STEP 2
Navigate to SETTINGS and press “OK”.
STEP 3
Navigate to STB DIAGNOSTICS and press “OK”.
STEP 4
Refer to the signal strength % shown on the top left of your screen.
If it is 65% or higher, please go to WhatsApp to receive further help.
If it is below 65%, please go to STEP 5.
STEP 5
Switch off the power for your box and make sure that the adapter’s power light is off.
STEP 6
Unscrew the satellite cable from the box and pull it out.
STEP 7
Plug the satellite cable back into the box and screw it back securely.
STEP 8
Switch on the power for your box and make sure that the adapter’s power light is on.
Please wait for 5 minutes.
STEP 9
Turn on your box. You should no longer be experiencing this issue.
If issue persist, please attach a picture of your General tab of the STB Diagnostics for assistance.
Centralized Dish
If issue persist under a centralised satellite dish, please refer to your respective Building Management before contacting our agents.
For more info on the product including offers and setup, visit product.astro.com.my/multiroom

1. Please standby computer/laptop to access to the internet and connection must be via LAN (cable) [Connect the LAN (cable) to the yellow port in Maxis Router and direct to computer/laptop].
2. You may open any web browser such as Google Chrome, Internet Explorer, Mozilla Firefox and etc.
3. On the address bar, please go to http://192.168.1.254 and below page will appear.
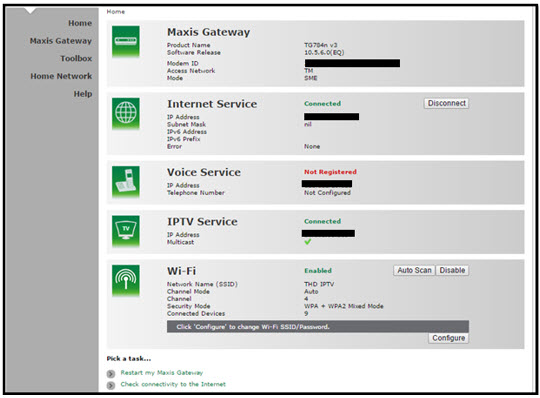
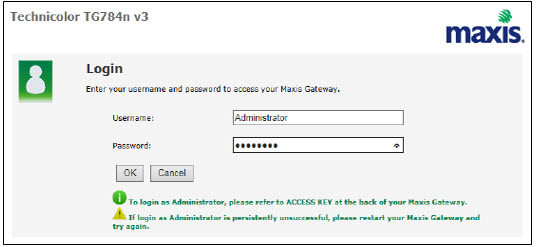
If below box appear, please enter required details:
USERNAME: Administrator
PASSWORD: (ACCESS KEY AT THE RGW STICKER)
(These are the defaults, if you have done previous configuration on your router the password may be different)
4. Once enter into the page "'TECHNICOLOR TG784N V3'', you may follow below steps to get the best wireless channel information.

A. Select "Home Network".
B. Click "WLAN: SSID" to proceed to next screen.
C. In order to get the best wireless channel, click "Wireless Scan" to scan available surroundings wireless Channel.

D. Please choose channel with lesser number of usage.
Example in below case, you may choose channel 4.

5. To configure wireless channel, please proceed with below steps.

A. Select "Home Network".
B. Click "WLAN: SSID" to proceed to next screen.
C. Then, click "Configure" to change the channel selection (automatic to manual) and other configuration option.

D. Please ensure below items:

i. WLAN Enable: Tick
ii. Interface Enable: Tick
iii. Change the Channel Selection to Manual
iv. Change the wireless Channel based on Step 4(D).
v. Once completed the selection, click the "Apply" button.
1. Clearly indicate full name of Astro customer, contact number and Astro subscription account number when making each payment (e.g. on bank-in slips)
2. For Direct Debit, please contact your bank for standing instructions. Provide the full name of Astro customer and Astro account number. The Direct Debit service may not be available with all banks. Please check with your bank for confirmation of Direct Debit service.
3. Please inform us of any changes in billing address/information by contacting us via one of these platforms.
IMPORTANT NOTICE: To avoid any problems in payment processing, please pay only at authorised Astro payment channels
No additional fees will be charged upon your relocation. However, you are required to notify Astro of your move. Please refer to Astro's General T&Cs for more information.
There is no contract for this subscription.
STEP 1
Switch off the power for your box and make sure that the adapter's power light is off.

STEP 2
Locate the SIM card at the left side and gently pull it out.

STEP 3
Wipe the SIM card's gold chip clean using a dry soft cloth.

STEP 4
Make sure the gold chip is facing down and reinsert it all the way in.

STEP 5
Switch on the power for your box and make sure that the adapter's power light is on.
Please wait for 5 minutes.

STEP 6
Turn on your Ultra Box. You should no longer be experiencing this problem.

If issue persist, please submit the issue in our Feedback Form with the error details and provide sim card number for assistance.
You can proceed with below troubleshooting if the weather is good. Otherwise, you may try again later.
STEP 1
On your remote, press the “HOME” button and the home menu will be displayed at the bottom of your screen.

STEP 2
Navigate to SETTINGS and press “OK”.

STEP 3
Navigate to STB DIAGNOSTICS and press “OK”.

STEP 4
Refer to the signal strength % shown on the top left of your screen.
If it is 65% or higher, please take the screenshot and submit your Feedback Form.
If it is below 65%, please go to Step 5.

STEP 5
Switch off the power for your box and make sure that the adapter’s power light is off.

STEP 6
Unscrew the satellite cable from the box and pull it out.

STEP 7
Plug the satellite cable back into the box and screw it back securely.

STEP 8
Switch on the power for your box and make sure that the adapter’s power light is on.
Please wait for 5 minutes.

STEP 9
Turn on your box. You should no longer be experiencing this issue.
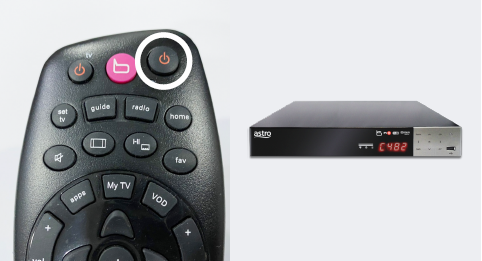
If issue persist, please submit the issue on our Feedback Form and attach a picture of your General tab of the STB Diagnostics for assistance.
Centralized Dish
If issue persist under a centralized satellite dish, please refer to your respective Building Management before contacting our agents.
STEP 1
Switch off the power for your box and make sure that the adapter's power light is off.

STEP 2
Locate the Smartcard at the front or right side and gently pull it out make sure that the adapter's power light is off.

STEP 3
Wipe the Smartcard's gold chip clean using a dry soft cloth.

STEP 4
Make sure the gold chip is facing upwards and reinsert it all the way in.

STEP 5
Switch on the power for your box and make sure that the adapter's power light is on.
Please wait for 5 minutes.

STEP 6
Turn on your box. You should no longer be experiencing this problem.

If issue persist, please submit your feedback form with error details and attach a picture of your sim card number for assistance.
For self-installation, in your first bill upon activation of your Plug& Play Box, the activation fee will be included as a separate line item in your bill alongside the subscription fee.
If you choose to install the Plug & Play Box via installer, you can pay the installation fee and activation fee directly to the installer upon installation. This will be reflected in your next bill itemised as setup fee.
Please refer below for the installation and activation fees for Astro customers on the new pack.

Currently, My Astro app and web supports TV pack upgrade. You can go to "Account' and scroll to "Subscription' section and select "TV pack'. You may reach out to us via WhatsApp at 03-9543 3838 for more details.
For Ultra and/or Ulti box users, launch the My Astro app on your Home screen and you will land on the My Astro account dashboard. Press ">' remote button to go to your Subscription card and "OK' button to proceed with the TV pack upgrade.
STEP 1
Check the Audio settings on your box and set to Auto.
Refer guide to change Digital Audio Settings.
STEP 2
If issue persist, check if there is any 3rd party device (sound system/hdmi splitter) connected between box and TV.
STEP 3
If using 3rd party devices, bypass/remove 3rd party device and make sure HDMI cable connected directly from box to TV.
STEP 4
If issue persist, connect to Live Agent via WhatsApp for help.
STEP 1
Check your current software version on your box.
If the software version updated (Refer to Table 1) , proceed to STEP 2.
If software version different from Table 1, click here for Software Update guide.

Once software is updated, tune to the impacted channel.
If issue persist, proceed to STEP 2.
STEP 2
Run Test Satellite Frequency.
Click here for the guide.
If dCSS Scan Entrypoint Success, proceed to submit report here.
Guide to submit report:
At Feedback Type select "I have Astro service related question/request" and Sub Category as "Technical Interruption".
Fill up all the required information and submit.
Please indicate if you agreed to recontract for 12 months (technical visit is FOC) or paid visitation (RM65).
You will receive appointment details via SMS within 48 hours.
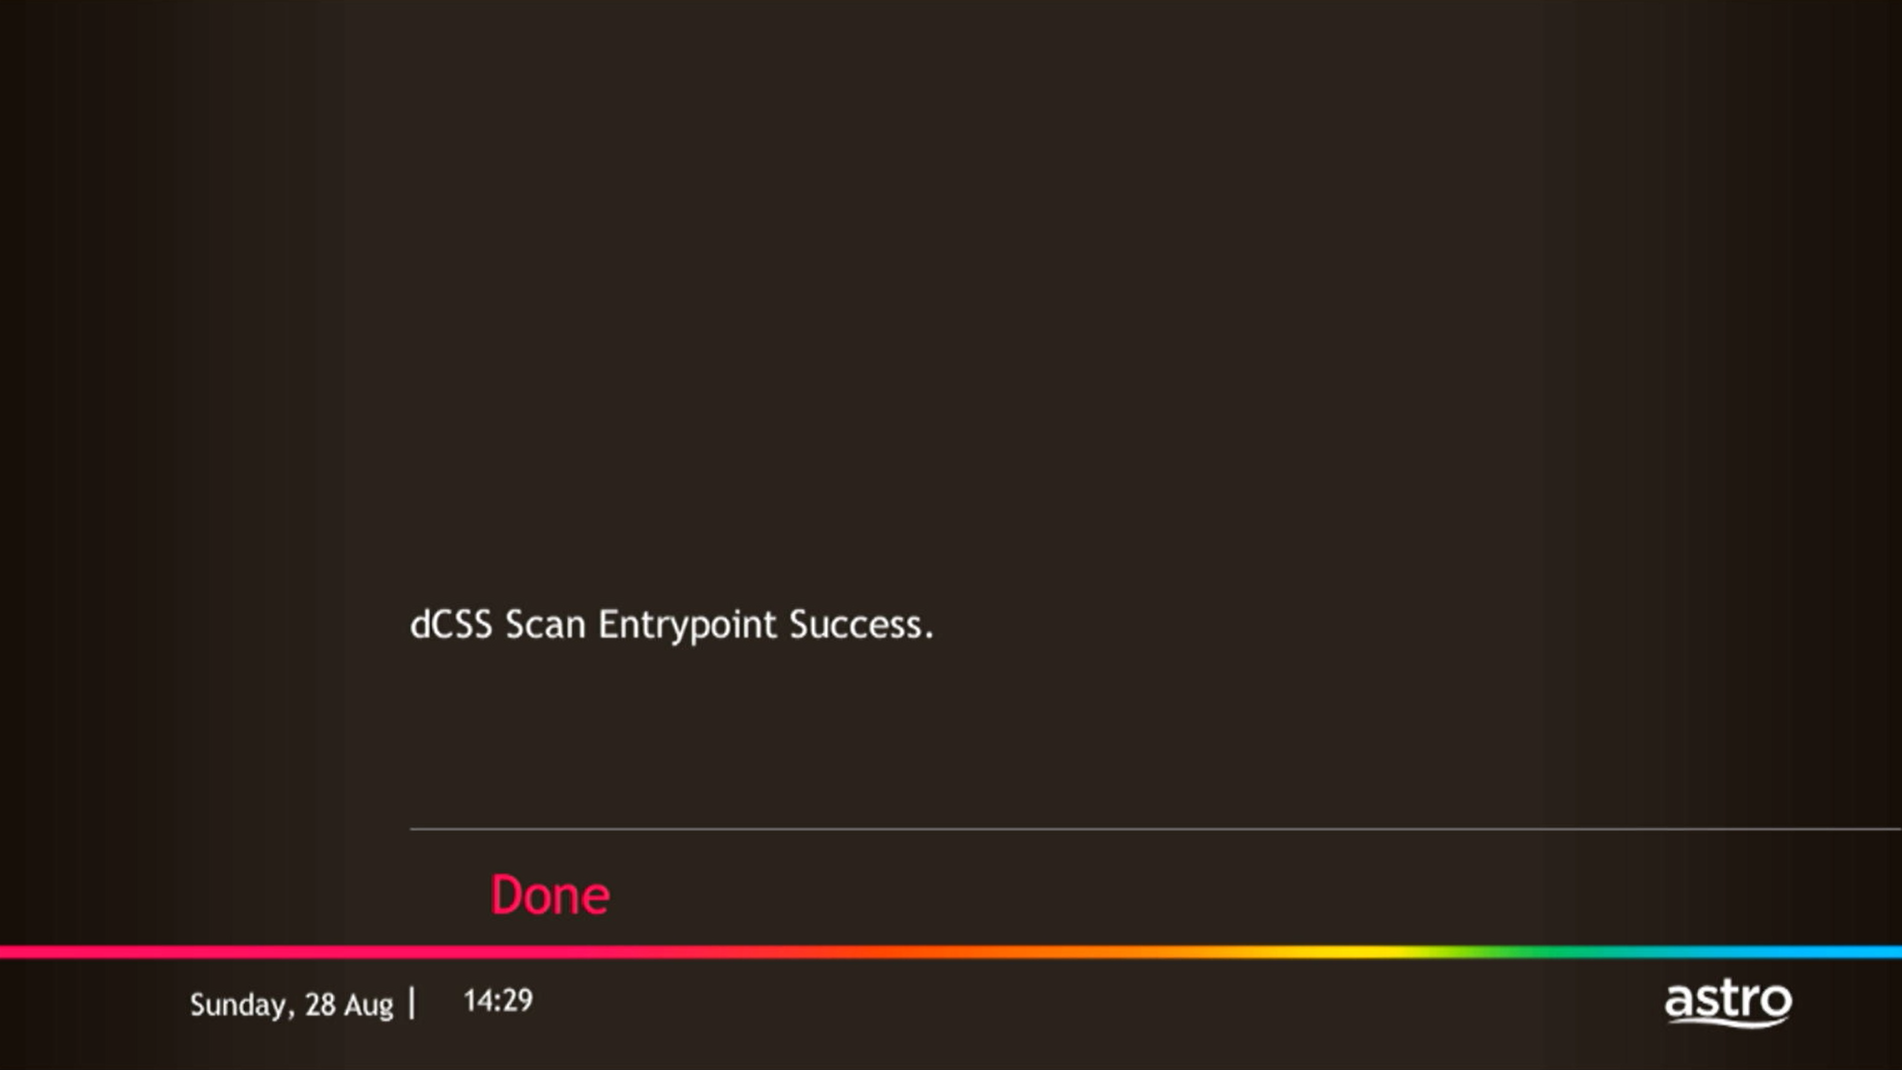
If dCSS Scan Entrypoint Fail, proceed to STEP 3.

STEP 3
Proceed to Update Satellite Frequency.
Click here for the guide.
Once completed, tune to the impacted channel.
If issue persist, proceed to submit report here.
Guide to submit report:
At Feedback Type select "I have Astro service related question/request" and Sub Category as "Technical Interruption".
Fill up all the required information and submit.
Please indicate if you agreed to recontract for 12 months (technical visit is FOC) or paid visitation (RM65).
You will receive appointment details via SMS within 48 hours.
Please check if you are streaming on a supported device. Astro GO is only applicable within the supported platforms; mobile devices (phones and tablets) and web browsers.
If you are still having issues, proceed to submit report via WhatsApp or Feedback Form.
Starting 12 December 2023, users have to use their registered email address, mobile number or a social account (Facebook, Google or Apple) to log into any of Astro's digital platforms, including My Astro, Astro GO and Astro's official website. Usernames as an Astro ID is no longer available. This change was made to ensure details linked to your Astro account are always updated and to improve the overall user experience on our platforms.
Disney+ Hotstar app is now available to Astro customers on the Ultra and Ulti Box will be able to enjoy the app on the big screen and stream all their favourite blockbuster movies from Hollywood to Hallyu and award-winning shows from Disney, Marvel, Star Wars, Pixar, National Geographic, FX and 20th Century Studios!
Astro GO is a free streaming companion app for all Astro customers to enjoy their favourite shows and channels on their smartphones, tablets, and computers - anytime, anywhere in Malaysia. Astro customers with an active Pay-TV subscription can link their accounts to watch corresponding on demand and TV channels available on Astro GO as part of their subscription.
You will regain access to your channels on Astro immediately once the equipment has been installed at your new house, provided your account is active. Customers can still enjoy viewing via Astro Go.
STEP 1
Press "HOME" button on your remote control.

STEP 2
Navigate to Settings and press "OK".

STEP 3
Navigate to STB Diagnostics and press "OK".

STEP 4
From General Tab, look at the Smart Card No for the smartcard number.

STEP 5
Take look at the Set Top Box Serial Number for the box serial number.
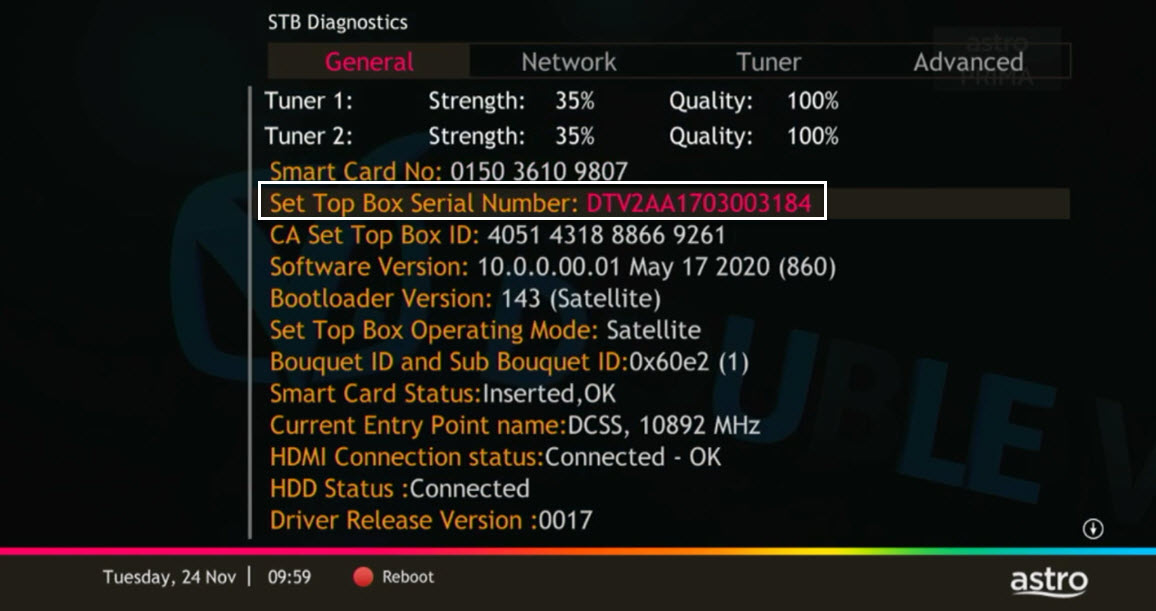


You may proceed with the following troubleshooting steps and it shouldn’t take you much longer than 15 minutes.
1. Please standby computer/laptop to access to the internet and connection must be via LAN cable (connect the LAN cable to the blue port in Cisco Router and direct to computer/laptop).
2. You may open any web browser such as Google Chrome, Internet Explorer, Mozilla Firefox and etc.
3. On the address bar, please go to http://192.168.1.1 and below page will appear.

4. Type the Username and Password as below. Then click "OK". (These are the defaults, if you have done previous configuration on your router the password may be different).
Username: admin
Password: admin (or time123)

5. Click "OK" when a Warning prompt that says,” Using this advanced utility to change your router settings could disable your network” appears. Below display will appears.

6. On the setup page, click the Wireless tab then click on the Basic Wireless Settings sub-tab.

7. On the Configuration View section, click the Manual radio button. Choosing the Manual setup will allow you to adjust your wireless channel according to your preference.

8. Click Wireless Security to view the security settings of your wireless network. Take note of the Security Mode and the Passphrase.

For the example below, the Security Mode used is WPA2/WPA Mixed Mode.
The Wireless name is called Network Name (SSID) and the Passphrase is your wireless password.

9. Now that you have the Wireless name and Password, you are ready to connect your wireless computers and devices to the network.
10. You may change the Network Name (SSID) and the Passphrase to follow your preferences and please ensure save the changes made. Please reconnect to the new wireless name with the new password once completed.
Astro wants to give our members the convenience of having all their favourite series, exciting originals, vernacular signatures, live sports and local blockbuster movies in one place. Astro customers will be able to enjoy greater convenience by having Netflix bundled with their Astro subscription, consolidating the subscriptions, and providing easy access for payment in a single bill, at the best value.
STEP 1
Switch off the power for your box and make sure that the adapter's power light is off.
STEP 2
Locate the Smartcard at the front or right side and gently pull it out.
Make sure that the adapter's power light is off.
STEP 3
Wipe the Smartcard's gold chip clean using a dry soft cloth.
STEP 4
Make sure the gold chip is facing upwards and reinsert it all the way in.
STEP 5
Switch on the power for your box and make sure that the adapter's power light is on. Please wait for 5 minutes.
STEP 6
Turn on your box. You should no longer be experiencing this problem.
If issue persist, please submit the issue on our Feedback Form and attach a picture of your smart card number for assistance.