
A free satellite TV service from Astro. Watch lifetime entertainment, news, learning & information and more.
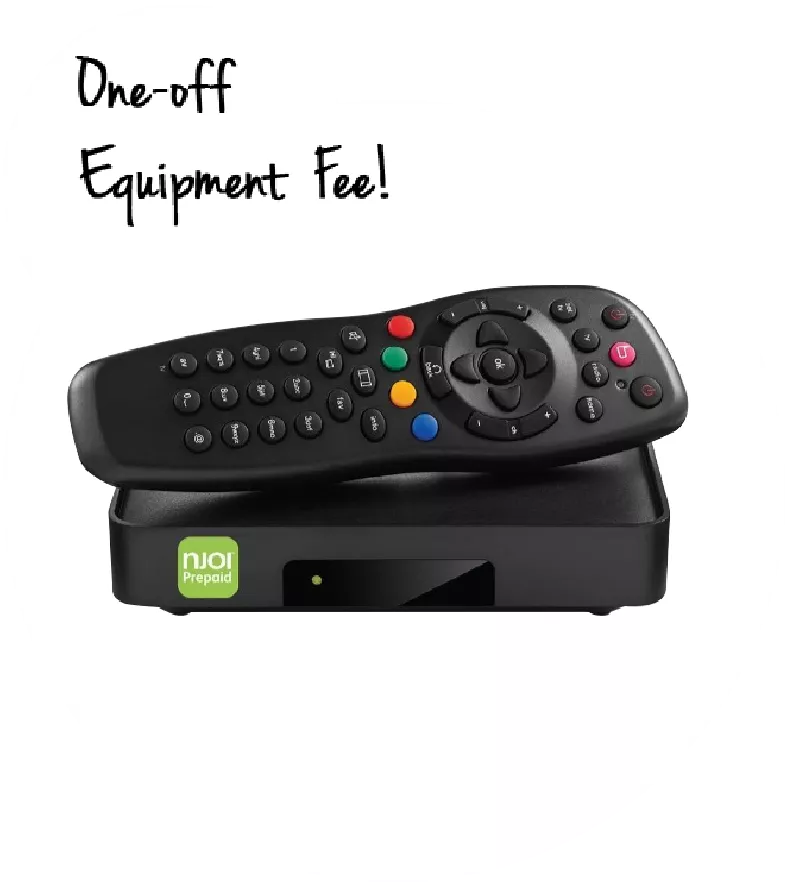
Pictures for illustration only.
Enjoy free access to 15+ TV channels & 10+ radio channels.
* Subject to Astro terms & conditions.


Step-1 |
Step-2 |
Step-3 |
Choose a plan & sign-up online. |
Sit back & wait for installation. |
Enjoy your new Astro / Broadband! |
A free satellite TV service from Astro. Watch lifetime entertainment, news, learning & information and more.
Pictures for illustration only.
New decoder only without satellite dish & cabling. You must have Astro/Njoi satellite dish and cable installed and working properly.
Including installation.
New decoder complete with satellite dish & cabling.
Including installation.
Applying for
| Njoi Astro UniFi Maxis |
Find your answers here.
We provide one stop service to apply Astro and Broadband for you.
You can avoid driving and queuing at the sales counter. We are the dealer that can help you to handle your application from the beginning to the end.
We do not charge you when you apply from us. There is no credit card information required to apply here. Charges are the same as you apply from the sales counter.
First, you can apply online, we will get back to you immediately during business hour. WhatsApp/Email/Fax us your Photocopy of IC (for malaysian) / Passport (for foreigners). When we receive all the information, we will proceed with your application immediately.
Once we receive your application with complete information, we will process your application immediately during business hour. The contractor from the service provider will then contact you for installation appointment once your application is approved.
Enjoy greater savings and hassle-free bill payment in one single bill for both Astro and Broadband. You get to enjoy Astro and Broadband at discounted price every month over the contract period of 24 months.
Astro offers multiple TV packs including Entertainment, Sports, Movies and Kids options. You can choose a pack that matches your viewing preferences and add optional streaming apps where available.
Yes, you may subscribe to Astro TV packs without bundling broadband. However, bundling Astro TV with Fibre Broadband may provide better monthly savings and convenience with a single bill.
For small households with light streaming and browsing, 100Mbps is usually sufficient. Larger families, gamers or heavy streamers may benefit from 500Mbps or 1Gbps plans for smoother performance across multiple devices.
Most Astro TV and Fibre broadband plans come with a 24-month contract. Early termination charges may apply if cancellation is made before the contract ends.
Yes, you may upgrade your TV pack or broadband speed at any time, subject to eligibility and coverage. A new contract period may apply depending on the upgrade.
Your monthly bill will be issued directly by Astro. You may receive it via email or access it through your Astro account. Bundled customers will receive a single combined bill for TV and broadband services.
Payment methods may include online banking, auto debit, credit card or other approved payment channels provided by Astro. Our team can guide you during the registration process.
If you experience any service interruption, you may contact Astro customer support for technical assistance. In many cases, issues can be resolved remotely or a technician will be arranged if necessary.
Yes, relocation is subject to service availability at your new address. Relocation charges and contract adjustments may apply depending on your plan.
No, you do not need a credit card to submit your application. Payment setup will be arranged directly with Astro after your service is approved.
Selected Astro TV packs allow optional add-ons such as streaming services depending on current promotions and availability. Additional monthly charges may apply.
Yes, a WiFi router is typically provided during fibre installation. The router model may vary depending on the selected broadband speed plan.
Yes, we will check the service coverage at your address before proceeding with your application to ensure broadband is available at your location.
For Malaysians, please provide a copy of your MyKad. For foreigners, provide a copy of your passport when submitting your broadband application.
After your application is approved, the service provider typically contacts you within 2 to 7 working days to arrange the broadband installation appointment.
Most Astro Broadband plans come with a 24-month contract starting from your installation date. If you relocate, a new 24-month contract may apply at your new address.
Yes, you can relocate your broadband service, subject to service availability at the new address. Your contract may reset for another 24 months from the new installation date.
Yes, you may request to relocate broadband devices within your home. Non-standard installation charges may apply and are payable to the installer directly after assessment.
Yes, you can switch to Astro Broadband. To avoid service interruption, it is recommended to activate the new service before terminating your current broadband contract.
Standard installations may be free during promotions, but non-standard installations (e.g., device relocation or complex wiring) may incur extra charges payable directly to the installer.
You may download My Astro App or visit My Astro web to manage your account and information. You also change your contact details via your TV by using the remote. Follow the steps below:
A. My Astro App
Step 1: Log in with your Astro ID
Step 2: Go to the Account tab and select Profile
Step 3: Under Mobile Number, tap the edit icon
Step 4:
Select your verification method. The OTP will be sent to your registered mobile number or email address.
Step 5: Enter the new mobile number and tap Next
Step 6: Enter the OTP sent to the new number and tap Verify
Step 7: A successful notification will be displayed

B. My Astro Web
Step 1: Log in with your Astro ID
Step 2: Go to the Personal Info button
Step 3: Step 3: Under Mobile Number, tap the edit icon
Step 4:
Select your verification method. The OTP will be sent to your registered mobile number or email address.
Step 5: Enter the new mobile number and tap Next
Step 6: Enter the OTP sent to the new number and tap Verify
Step 7: A successful notification will be displayed
C. For Ultra and/or Ulti Users
STEP 1
On your remote, press the HOME button and the home menu will be displayed on top of your screen.

STEP 2
Navigate to Settings.

STEP 3
Navigate to Video Resolution and press “OK”.

STEP 4
Navigate to your preferred selection and press “OK”.
Recommended to select Auto.

STEP 5
Navigate to Save and press "OK" to confirm your selection if able to read the text properly.
Otherwise, navigate to Cancel to revert to previous settings.

STEP 1
Identify your remote control:

a) Remote control with Astro logo at the bottom of the remote, proceed to STEP 2.
b) Remote control with Astro logo at the top of the remote, proceed to STEP 4
STEP 2 (Astro Logo at the bottom of the Remote)
On your remote, press the “set tv” button and set tv instructions will be displayed on top of your screen:

STEP 3
Follow the steps appear on the TV screen to sync your Astro remote and complete the setup.

STEP 4 (Astro Logo atthe top of the Remote)
Press and hold “tv input” key on bottom left of the remote for 3 seconds until the LED blinks twice.

STEP 5
Enter the 2-digit TV Code of your TV Brand and the LED will blink twice:

STEP 6
Try out the TV controls (TV Standby or adjust Volume) to check if they are working correctly.

STEP 7
Press ok and wait for the LED to blink twice to save the settings.
The Ultra Box or Ulti Box and the SIM Card are property of Astro, as per our General Terms and Conditions for Astro Services. Therefore, customers are accountable for returning the boxes upon the termination of their Astro subscription. Otherwise, an RM100 (exclusive of Sales and Service Tax) box fee will be charged to the customer's account.
Astro customers with the Ultra or Ulti Box can access Prime Video via their Ultra/Ulti Box or stream directly using the Prime Video app. If you have not yet upgraded to Astro’s Ultra/Ulti Box, please reach out to us on WhatsApp by sending “Hi” to 03-9543 3838.
STEP 1
On your remote, press the ... button and the Channel Guide page will be displayed on your screen.

STEP 2
Select the channel you would like to unlock and press "OK".

STEP 3
Select "Unlock Channel" and press "OK".

STEP 4
Enter the PIN to unblock the channel.

STEP 5
You are successfully unlocked the channel when this screen appears.

STEP 1
On your remote, press the HOME button and the home menu will be displayed on top of your screen.

STEP 2
Navigate to Settings.

STEP 3
Navigate to Remote Control Settings and press "OK".

STEP 4
Follow the steps appear on the screen to sync your Astro remote.

There will be no changes to your account. However, by paying 5 days earlier, your transactions will be processed in a timely manner and to allow you to enjoy uninterrupted viewing before the next bill is generated for the following month.
For more information you may visit
https://www.hasil.gov.my/en/e-invoice/
OR call the IRBM help desk line at 03-8682 8000 OR email them at [email protected]
[email protected]
.
Yes, you may change the interface language of the app. To access the language settings, please click "Profile" > "Settings" > "Language" and select your preferred language
Further details on pricing, billing and availability will be confirmed in coming months. Look out for more details and register your interest via https://astro.com.my/Netflix
Your Astro X3 pack will be activated immediately after you complete your sign-up. Once your sign-up is complete, you can start streaming its content immediately via the Astro app on your Smart TV or through Astro GO on supported devices
a) If you sign up via Astro’s Official Website:
You will be required to create an Astro ID and password during sign-up. Once your subscription is successfully activated, you will receive a "Welcome to Astro" email confirming your activation and can start streaming right away.
To find out more, please visit: Here
i. If you sign up via Astro Sales Agents:
ii. You will receive a “Welcome to Astro” email prompting you to create your Astro ID password and confirming your successful activation. Once your password is set, you can start streaming.
b)Important Notes:
i. When creating your Astro ID, you will be required to use an Astro ID that is not linked to an active Astro account. If the Astro ID (i.e. email address) you enter is already linked to an active Astro account, you will be prompted to use a different Astro ID
ii. However, if the Astro ID you enter is linked to an inactive Astro account, you will have the option to reuse that Astro ID.
If you did not receive the recovery email or verification code, please make sure that:
To find out which email or phone number you have used to register your Astro ID, you may submit a feedback form. Kindly select feedback type "I have an enquiry/issue with Apps" choose "Astro GO"

We will get in touch with you within 48 hours to solve your enquirie
STEP 1
Switch off the power for your box and make sure that the adapter's power light is off.

STEP 2
Locate the Smartcard at the front or right side and gently pull it out make sure that the adapter's power light is off.

STEP 3
Wipe the Smartcard's gold chip clean using a dry soft cloth.

STEP 4
Make sure the gold chip is facing upwards and reinsert it all the way in.

STEP 5
Switch on the power for your box and make sure that the adapter's power light is on.
Please wait for 5 minutes.

STEP 6
Turn on your box. You should no longer be experiencing this problem.

If issue persist, please submit your feedback form with error details and attach a picture of your sim card number for assistance.
Tengok Astro guna internet dengan mod Plug & Play (Part 1)
STEP 1
On your remote, press the Home button and the menu will be displayed on top of your screen.

STEP 2
Navigate to Settings.

STEP 3
Navigate to Restore and press "OK".

STEP 4
Navigate to Restore Factory Settings and press "OK".

Enter your PIN to access this setting. (Default PIN is 0000).

STEP 6
Navigate to Restore and press "OK" to confirm your selection.
Otherwise, navigate to Cancel, go back to remain the settings.

STEP 7
Please wait while the box restoring defaults and will reboot once complete.

STEP 8
Your box will automatically restart and display this screen.
Click here to follow New Installation Settings guide for Satellite
Click here to follow New Installation Settings guide for Plug and Play

Astro wants to give our members the convenience of having all their favourite series, exciting originals, vernacular signatures, live sports and local blockbuster movies in one place. Astro customers will be able to enjoy greater convenience by having Netflix bundled with their Astro subscription, consolidating the subscriptions, and providing easy access for payment in a single bill, at the best value.
STEP 1
On your remote, press the HOME button and the home menu will be displayed on top of your screen.

STEP 2
Navigate to Settings.

STEP 3
Navigate to Satellite Settings and press “OK”.

STEP 4
Navigate to LNB Setup and press “OK”.

STEP 5
Select Universal and press "OK".

STEP 6
Navigate to Next and press "OK" to confirm your selection.

STEP 7
Select 01 M3B VL - 10732 as the Entry Point.

STEP 8
Navigate to Next and press "OK" to confirm your selection.

STEP 9
Please wait until the signal reading updated.
Then navigate to Finish and press "OK" to complete the setup.

To access the app, please ensure the following:
You are an existing Astro Fibre customer, and you have a valid Astro ID and password to log in.
If you still cannot access the app:
Make sure you have the latest app version from the App Store/Google Play Store. If it is not the latest versioan, please update the app and try again.
Our customers deserve the best streaming entertainment experience with us and from 9 December 2024, the new Astro One Packs make that possible.
From just RM49.99, these new packs make it simple, flexible and accessible for all Malaysians to stream the content they love on one platform, with up-to 4 concurrencies on Astro GO. Customers can easily make changes to their subscriptions via the My Astro app, including updates to their packs, choosing from up to 11 streaming apps, or switching to different ones, as and when they like.
Customers can choose between:
For more information, visit www.astro.com.my or send us a message on WhatsApp at 03-9543 3838.
The Astro X3 packs are available to both new and existing Astro customers, making it easier for customers to enjoy a fully digital viewing experience. For existing Astro customers, subscribing to an Astro X3 pack under a 12-month contract will be treated as a new subscription, and a separate account will be created.
To manage this subscription, customers will need to register a new Astro ID using a new email address. This ensures a smooth and seamless self-service experience, with each subscription managed independently.
If you see this message, it means the maximum number of devices currently streaming on your Astro account has been exceeded.
Please perform the following checks and troubleshooting steps:
1. Stop Streaming on Other Devices
2. Wait a Few Minutes
3. Try Again
4. Check Your Device Usage
If you are unable to remove a device or continue to see the error message, proceed to submit report via WhatsApp or Feedback Form and provide:
This will help our support team investigate and assist you further.
Note: Please be aware that only one Smart TV device is allowed per account at any point in time.
For enquiries relating to Disney+ content, application features, settings or functionality, please visit the Disney+ Help Centre.
You will be able to watch the same video on demand content on your Ultra/Ulti Box as the ZEE5 mobile app or website. However, ZEE5 live channels are currently not available on the Ultra/Ulti Box. Please stay tuned for updates!
Customers will still be charged a penalty of RM 100 (exclusive of Sales and Service Tax), as per our terms and conditions, as the Astro Box & SIM Card are properties of Astro.

Byond Box (DMT 5)
STEP 1
Switch on the power for your box and make sure that the adapter's power light is on.

STEP 2
Put the box on standby mode.

STEP 3
Press and hold the Home button on the box.

STEP 4
Wait until "boot" appear on the front panel and released.

STEP 5
New Installation Settings page will appear.
Click here for the guides to complete the setup.


Byond Box (DMT 4)
STEP 1
Switch off the power of your box and ensure the adapter�s power light is off.

STEP 2
Switch on the power of your box and ensure the adapter�s power light is on.
STEP 3
Press and hold the Ch+ and Ch- keys on the box simultaneously when the "boot" message appears on the front panel.

STEP 4
Wait until the "Clr" message appears on the front panel, then release the Ch+ and Ch- keys.

STEP 5
New Installation Settings page will appear.
Click here for the guides to complete the setup.

Byond Box (Zapper)
STEP 1
Ensure your box is on standby mode. (Red light on box's front panel).

STEP 2
Press and hold the Standby button. Wait until the LED at front panel change from red to green for 3 times, then release the button.

STEP 3
New Installation Settings page will appear.
Click here for the guides to complete the setup.

Byond Box (New Zapper)
STEP 1
Switch off the power of your box and ensure that the adapter�s power light is off.
STEP 2
Switch on the power of your box and ensure that the adapter's power light is on.
STEP 3
Keep pressing the 'Power' button until the Startup Option screen appears.

STEP 4
Press "369" on the remote control to trigger refresh box setting menu.

STEP 5
Press "OK" to proceed. The box will be refreshed to the original setting.

STEP 6
New Installation Settings page will appear.
Click here for the guides to complete the setup.
For Astro Ultra Box or Ulti Boxes, there will be an itemised charge of "Box Fee” stated in your Astro bill.
If you don't currently have an Ultra or Ulti Box, you can upgrade by calling or sending a "Hi" message via WhatsApp to 03-9543 3838. Select your preferred language, then type “2” to upgrade and select “Box upgrade” option. Once your Ultra/Ulti Box is successfully activated, you'll able to access Prime Video app on Astro Box. Activate the app to enjoy the 2 months access. To activate click
https://product.astro.com.my/apps/primevideo
For self-installation, in your first bill upon activation of your Plug& Play Box, the activation fee will be included as a separate line item in your bill alongside the subscription fee.
If you choose to install the Plug & Play Box via installer, you can pay the installation fee and activation fee directly to the installer upon installation. This will be reflected in your next bill itemised as setup fee.
While there is no limit on device registrations, concurrent viewing limits depend on the HBO Max subscription plan: the HBO Pack with HBO Max Premium plan allows streaming on up to 4 devices simultaneously, whereas the HBO Pack with HBO Max Standard plan permits streaming on up to 2 devices at the same time.
Yes, effective on bill date 9th July 2024 onwards, the Service Tax for Astro Broadband Bundle/Astro Fibre Bundle will be streamlined at 6%. Astro Fibre Standalone and Mesh WiFi charges will remain at 6% Service Tax as announced on 1st March 2024.
The payment will take some time to reflect in My Astro app and web account. If you experience any further issues or it is still not reflecting in My Astro, please reach out to us via WhatsApp at 03-9543 3838 for more details.
Please submit the feedback form and ensure the required document is attached for our review.
If you have forgotten your username or password, you may follow the steps below:
Step 1. Go to netflix.com
Step 2: Click on Sign In
Step 3: Click on "Need Help
To check your payment history for your Astro bill, you can do it through My Astro. Here's how:
1. Download the My Astro app or visit My Astro web
2. Login using your Astro ID
3. Go to Account > Bills > Payment History
4. You will be able to see your payment history for the last twelve (12) months
💳 Want to manage your Astro bills easily?
📱 Download the My Astro app to:
- View and download bill statements
- Check payment history
- Pay in just a few taps
Astro X3 packs offer a new way to enjoy Astro — without the need for a set-top box or satellite dish, giving you a simpler and more flexible way to watch your favourite content. With no box required, you can start streaming your favourite entertainment shows and live sports instantly via the Astro app on selected Smart TVs and personal devices such as smartphones, tablets, and laptops — anytime, anywhere. And with just a 12-month contract, these plans offer greater flexibility while delivering the same breadth of content you enjoy with Astro.
You can choose from two flexible 12-month options, depending on your viewing preferences:
*No-contract options will be available from December 2026.
As e‑Invoicing supports quicker processing, smoother transactions and a more seamless billing and tax compliance experience over time, we highly encourage customers to stay opted in. It also makes it much easier for you to keep proper records for tax relief claims. If you still wish to stop receiving e‑Invoices, you can opt out through the My Astro website or the My Astro app.
On the My Astro website:
On the My Astro app:

STEP 1
Check your current software version on your box.
If the software version updated (Refer to Table 1) , proceed to STEP 2.
If software version different from Table 1, click here for Software Update guide.

Table 1
Once software is updated, tune to the impacted channel.
If issue persist, proceed to STEP 2.
STEP 2
Run Test Satellite Frequency.
Click here for the guide.
If dCSS Scan Entrypoint Success, proceed to submit report here.
Guide to submit report:
At Feedback Type select "I have Astro service related question/request" and Sub Category as "Technical Interruption".
Fill up all the required information and submit.
Please indicate if you agreed to recontract for 12 months (technical visit is FOC) or paid visitation (RM65).
You will receive appointment details via SMS within 48 hours.

If dCSS Scan Entrypoint Fail, proceed to STEP 3.

STEP 3
Proceed to Update Satellite Frequency.
Click herefor the guide.
Once completed, tune to the impacted channel.
If issue persist, proceed to submit report here.
Guide to submit report:
At Feedback Type select "I have Astro service related question/request" and Sub Category as "Technical Interruption".
Fill up all the required information and submit.
Please indicate if you agreed to recontract for 12 months (technical visit is FOC) or paid visitation (RM65).
You will receive appointment details via SMS within 48 hours.
If you are currently receiving a paper bill, your billing delivery method will automatically switch to e-bill once your e-invoice request is accepted. This also means you'll be saving RM10 on paper bill fees. Please ensure that your email address is accurate.
Click here
if you wish to update your contact details.
Real-time payments are posted almost instantaneously. However, daily system maintenance occurs between 12AM to 3AM - any payment made during this period will be delayed until system maintenance is complete.
STEP 1
On your remote, press the HOME button.

STEP 2
Navigate to Update Satellite Frequency and press “OK”.

STEP 3
Choose Test Satellite Frequency and press “OK”.

STEP 4
Select Yes, continue and press "OK" to start the test.
Otherwise, select No, go back to cancel.

STEP 5
Satellite Frequency Test progress screen will be displayed.

STEP 6
The test result will be displayed once completed.
Press "OK" to go back to channel.

For technical visit, the current fees will remain unchanged i.e.: 8% Service Tax absorbed by Astro. As for installation fees, current fees will remain unchanged i.e.: 6% Service Tax has already been included in installation fees, as 2% will be absorbed by Astro.
Yes, your information will still be available in the HBO Max app if you choose to resubscribe directly to HBO Max through
www.hbomax.com
. To keep your preferences and account settings, ensure you use the same email address when you resubscribe.
No additional fees will be charged upon your relocation. However, you are required to notify Astro of your move. Please refer to Astro's General T&Cs for more information.
You can get your TIN from the
MyTax Portal
or visit the nearest IRBM branch.
To allow customers to decide on their WiFi connection arrangement based on their preference upon being advised by the installer on-site.
User to manually connect their devices to different WiFi bands based on their usage and preference.
Yes, for customers on the Entertainment, Entertainment Plus, Premium 2, Premium 3 or
Platinum Pack, you may remain with your current Asian Favourites selection: Chinese, Indian or
Indonesian. If you would like to add Viu Premium to your bundle, you may do so for only
RM8.40/month (RRP: RM21.90). Please reach out to us via WhatsApp by typing “Hi” at 03-9543
3838 to add Viu Premium to your subscription.
To set up a Mesh WiFi network around your house, the Mesh unit will need to be paired with the WiFi router. Steps to pair these two devices are as follows:
i. Place the Mesh unit close to the WiFi router (within 2 meters) and power it on
ii. After the Mesh unit starts up, press and hold the WPS buttons of the Mesh unit and the WiFi router for 3 - 5 seconds in turn within 2 minutes
iii. After the WLAN and Internet indicators of the Mesh turns steady blue, the Mesh is connected to the Internet
iv. Move the Mesh to the desired place where you need to expand WiFi and power it on. After the Internet indicator turns steady blue, WiFi is expanded successfully.
Please ensure that you have entered the correct email address or mobile number associated with your Disney+ account.
If you still do not receive the OTP, please WhatsApp or call Astro’s Customer Service at +603 9543 3838.
To check your Astro subscription plan or Astro package details using My Astro, you can:

🔄 Want to manage your Astro subscription easily?
📱 Download the My Astro app to:
- Manage your pack subscriptions
- Get add-ons in just minutes
- Get details about your contract
Yes, you will need to activate SecureGo again if you're on a new device.
When you activate SecureGo on a different device, you will receive an email to notify you that the device has been de-registered.
If you suspect that someone else has gained access to your phone, contact our customer service immediately at 03-9543 3838 to unlink your Astro ID.