
A free satellite TV service from Astro. Watch lifetime entertainment, news, learning & information and more.
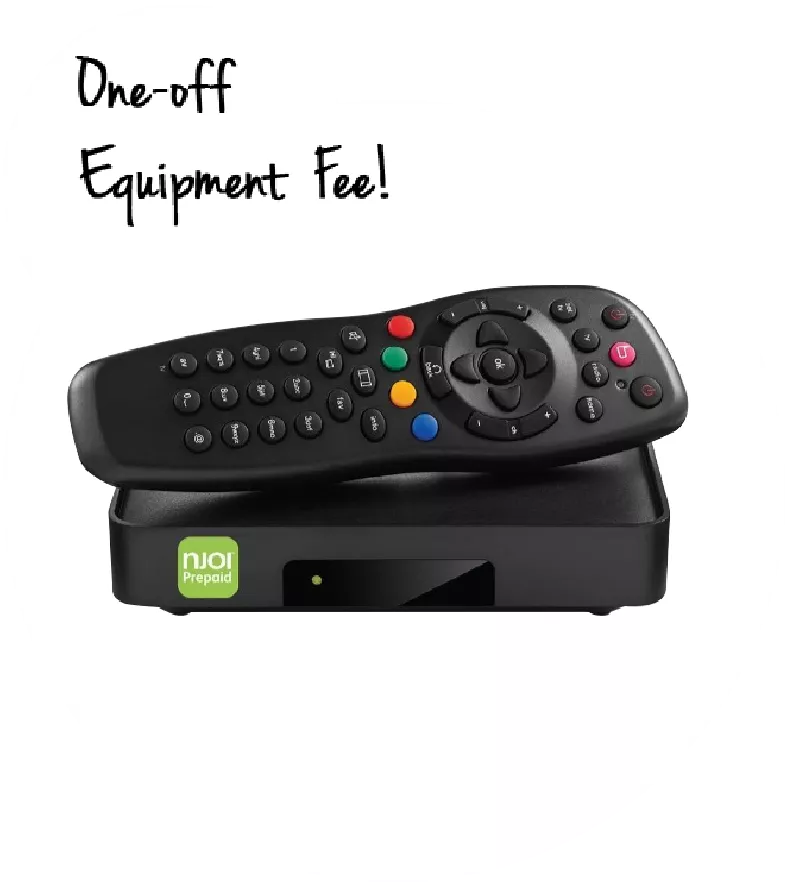
Pictures for illustration only.
Enjoy free access to 15+ TV channels & 10+ radio channels.
* Subject to Astro terms & conditions.


Step-1 |
Step-2 |
Step-3 |
Choose a plan & sign-up online. |
Sit back & wait for installation. |
Enjoy your new Astro / Broadband! |
A free satellite TV service from Astro. Watch lifetime entertainment, news, learning & information and more.
Pictures for illustration only.
New decoder only without satellite dish & cabling. You must have Astro/Njoi satellite dish and cable installed and working properly.
Including installation.
New decoder complete with satellite dish & cabling.
Including installation.
Applying for
| Njoi Astro UniFi Maxis |
Find your answers here.
We provide one stop service to apply Astro and Broadband for you.
You can avoid driving and queuing at the sales counter. We are the dealer that can help you to handle your application from the beginning to the end.
We do not charge you when you apply from us. There is no credit card information required to apply here. Charges are the same as you apply from the sales counter.
First, you can apply online, we will get back to you immediately during business hour. WhatsApp/Email/Fax us your Photocopy of IC (for malaysian) / Passport (for foreigners). When we receive all the information, we will proceed with your application immediately.
Once we receive your application with complete information, we will process your application immediately during business hour. The contractor from the service provider will then contact you for installation appointment once your application is approved.
Enjoy greater savings and hassle-free bill payment in one single bill for both Astro and Broadband. You get to enjoy Astro and Broadband at discounted price every month over the contract period of 24 months.
Astro offers multiple TV packs including Entertainment, Sports, Movies and Kids options. You can choose a pack that matches your viewing preferences and add optional streaming apps where available.
Yes, you may subscribe to Astro TV packs without bundling broadband. However, bundling Astro TV with Fibre Broadband may provide better monthly savings and convenience with a single bill.
For small households with light streaming and browsing, 100Mbps is usually sufficient. Larger families, gamers or heavy streamers may benefit from 500Mbps or 1Gbps plans for smoother performance across multiple devices.
Most Astro TV and Fibre broadband plans come with a 24-month contract. Early termination charges may apply if cancellation is made before the contract ends.
Yes, you may upgrade your TV pack or broadband speed at any time, subject to eligibility and coverage. A new contract period may apply depending on the upgrade.
Your monthly bill will be issued directly by Astro. You may receive it via email or access it through your Astro account. Bundled customers will receive a single combined bill for TV and broadband services.
Payment methods may include online banking, auto debit, credit card or other approved payment channels provided by Astro. Our team can guide you during the registration process.
If you experience any service interruption, you may contact Astro customer support for technical assistance. In many cases, issues can be resolved remotely or a technician will be arranged if necessary.
Yes, relocation is subject to service availability at your new address. Relocation charges and contract adjustments may apply depending on your plan.
No, you do not need a credit card to submit your application. Payment setup will be arranged directly with Astro after your service is approved.
Selected Astro TV packs allow optional add-ons such as streaming services depending on current promotions and availability. Additional monthly charges may apply.
Yes, a WiFi router is typically provided during fibre installation. The router model may vary depending on the selected broadband speed plan.
Yes, we will check the service coverage at your address before proceeding with your application to ensure broadband is available at your location.
For Malaysians, please provide a copy of your MyKad. For foreigners, provide a copy of your passport when submitting your broadband application.
After your application is approved, the service provider typically contacts you within 2 to 7 working days to arrange the broadband installation appointment.
Most Astro Broadband plans come with a 24-month contract starting from your installation date. If you relocate, a new 24-month contract may apply at your new address.
Yes, you can relocate your broadband service, subject to service availability at the new address. Your contract may reset for another 24 months from the new installation date.
Yes, you may request to relocate broadband devices within your home. Non-standard installation charges may apply and are payable to the installer directly after assessment.
Yes, you can switch to Astro Broadband. To avoid service interruption, it is recommended to activate the new service before terminating your current broadband contract.
Standard installations may be free during promotions, but non-standard installations (e.g., device relocation or complex wiring) may incur extra charges payable directly to the installer.
Call our contact centre 03-9543 3838 or visit us at astro.com.my.
STEP 1 On your remote, press the Home button and the Home Page will be displayed on your screen.

STEP 2
Navigate to Profile.

STEP 3
The Profile Selection Screen will be displayed.

STEP 4
Navigate to Edit Profile.

STEP 5
Choose a profile to edit.

STEP 6
Choose a new Profile Picture and press “OK”.

Upon completion of the termination process, customer will receive one last closing bill stating the total amount due to Astro according to their billing option.
For customers who had opted to switch their billing option to e-bill or SMS bill, they will receive their final bill accordingly.
For customers who opted for paper bill, they will receive the final bill via paper bill. (The Paper Bill Charge will be applied).
No. When you log in to the new Disney+ app using the same email address or mobile number associated with your existing Disney+ subscription, Disney+ will match the subscription linked to your account, so you can continue using your current subscription without duplicate billing.
STEP 1
On your remote, press the HOME button and the home menu will be displayed on top of your screen.

STEP 2
Navigate to Settings.

STEP 3
Navigate to Standby Mode and press "OK".

STEP 4
Navigate to your preferred selection and press "OK".

STEP 5
Navigate to Save and press "OK" to confirm your selection.

Yes. Charges for your Disney+ subscription will begin once the subscription has been successfully added to your Astro account.
Yes, you have the option to transfer the credit balance to another active Astro account. It will be considered as payment to that account and is subject to Astro's terms & conditions.
No, your existing add-ons will not be retained. When you terminate your current Astro subscription, all associated add-ons will also be cancelled. As the Astro X3 pack is a separate subscription under a new account, you will need to subscribe to your desired add-ons again, subject to availability under the new plan.
Certain content is limited to selected countries due to copyright restrictions. Hence, you may not be able to view certain movies in your country.
Bahasa Malaysia (BM) and Traditional Chinese subtitles will be available where rights permit. However, subtitle availability may vary depending on the title.
You may reach out to Astro's customer service at 03-95433838 if you think there's an error regarding your redemption or rewards.
We want to ensure that only the authorised account owner can have access to their Astro account. This activity ensures that only you can log in and access all the details tied to your Astro account.


The default login of the router as below. If you have done a configuration on your router previously, the password may be different.
Username: user
Password: Router S/N (Available on the sticker at the back of the router)
4. Once you have successfully login, the router's web-based setup page will appear. Please follow below steps for the configuration.

5. From the left menu, choose Wireless 2.4GHz and then click Basic Settings tab on the left menu to access to below screen.

6. You may change the Wireless Network Name (SSID) and the SSID Password to follow your preferences, then click "Save" for the changes to take place.
Please reconnect to the new wireless name with the new password once completed.
7. Since this is a dual band router, you will have 2 Wireless Network Names (SSID) i.e. 2.4GHz and 5GHz. You may connect to any of the SSID, preferably with a stronger signal available.
You may change the Wireless Network Name (SSID) and the SSID Password to follow your preferences for 5GHz by choosing Wireless 5GHz then click Basic Settings.
Click "Save" for the changes to take place and reconnect to the new wireless name with the new password once completed.

You can access your Prime Video Account on up to three (3) devices at a time (including your Ultra/Ulti Box), have up to 6 different profiles. However, you are only able to stream 2 devices concurrently for a single show/movie. To ensure a smoother streaming experience, please sign out from any unused devices.
Description | Benefit |
Profiles | Up to 6 profiles including Kids profile |
Concurrent streams | Up to 3 devices |
Simultaneous streams of same content | Up to 2 devices |
Currently, Maxis, Digi, Celcom, TuneTalk, U-Mobile, Yes, XOX and Webe.
Follow the steps below to activate and access Prime Video.
a. Via Astro’s Ultra/Ulti Box
Step 1: Launch Prime Video from the application rail (on the Home page)

Step 2: Scan the QR Code displayed on your TV screen using your mobile device to be redirected to the Prime Video app

Step 3: Once you are redirected to the Prime Video app on your mobile, create an Amazon Prime account using your mobile number or email address. Then click on ‘Verify mobile number’

Step 4: Now that you have activated your Prime Video account, your TV screen would be refreshed as below

Step 5: Click on Proceed and then on the “Sign in” button

Step 6: Pair your Ultra/Ulti Box to your Prime Video account by scanning the QR Code using your mobile device

Step 7: Enter the registration code displayed on your TV screen on either a mobile browser or open the Prime Video app on your mobile device, and then click "Allow".

b. Via Astro’s Website https://product.astro.com.my/apps/primevideo
Step 1: Visit https://product.astro.com.my/apps/primevideo and click on "Activate Prime Video Now" then log in using your Astro ID and follow the steps on screen.
Step 2: Scan the QR Code displayed on your TV screen using your mobile device to be redirected to the Prime Video app
Step 3: Once you are redirected to the Prime Video app on your mobile, create an Amazon Prime account using your mobile number or email address. Then click on ‘Verify mobile number’
Step 4: Now that you have activated your Prime Video account, your TV screen would be refreshed as below
Step 5: Click on Proceed and then on the “Sign in” button
Step 6: Pair your Ultra/Ulti Box to your Prime Video account by scanning the QR Code using your mobile device
Step 7: Enter the registration code displayed on your TV screen on either a mobile browser or open the Prime Video app on your mobile device, and then click "Allow".
c. Via My Astro app
Step 1: Download the My Astro app from the Apple App Store, Google Play Store, or Huawei AppGallery.
Step 2: Go to Account > Subscription > Add-ons > Manage your add-ons > select ‘Prime Video’ > Proceed then click on ‘Confirm order’

Step 3: Once done, go back to Account > Subscription > Add-ons. Here, you will be able to see ‘Prime Video’ under the list of ‘Apps’. Click on it and follow the steps displayed on screen to activate your Prime Video account

Step 4: Once you are redirected to the Prime Video app on your mobile, create an Amazon Prime account using your mobile number or email address. Then click on ‘Verify mobile number’
Step 5: Scan the QR Code displayed on your TV screen using your mobile device to be redirected to the Prime Video app
Step 6: Click on Proceed and then on the “Sign in” button
Step 7: Pair your Ultra/Ulti Box to your Prime Video account by scanning the QR Code using your mobile device
Step 8: Enter the registration code displayed on your TV screen on either a mobile browser or open the Prime Video app on your mobile device, and then click "Allow".
Step 9: Prime Video is now part of your subscription. Enjoy!
You may report the incident on WhatsApp at 03-9543 3838 by typing PNP and our access our user guide or request for further help from our dedicated agents. Please have your Airway Bill tracking numbers ready for validation.If a replacement box/Astro SIM card is deemed necessary, a new Box and a new Astro SIM card will be couriered to your service address.
If you have a random Astro power cable, remote control or old box lying around at home, you are required to discard them only at registered collection centres for proper handling and management of e-waste in an environmentally sound manner. Click here to find a registered collection centre near you.
For all recycling-related questions, please click here.
Please perform the following checks and troubleshooting steps:
1. Check if your TV supports the Astro app.
The Astro app is generally available on selected:
Kindly check that your Smart TV supports the Astro Smart TV app (kindly refer here).
If your TV uses a different operating system (e.g., older proprietary OS), the Astro app may not be available.
2. Update your TV software.
Go to: Settings → Support → Software Update
Install any available updates, then restart the TV and try again.
3. Search the correct app store.
Search for "Astro" or "Astro GO" (depending on your region and service availability).
4. If your TV's region is set incorrectly, certain apps may not appear.
Look under: Settings → General → Location/Region
Ensure it matches your actual country.
If you are still having issues, proceed to submit report via WhatsApp or Feedback Form and provide:
This will help our support team investigate and assist you further.
Kindly note that affected customers will be adequately informed 30 days prior to the implementation via SMS which are sent out in phases (Starting 1 July), with scheduled announcements across WhatsApp, My Astro app, and Astro website.
When you have reached the duration (years) needed for the upgrade, we will upgrade you into your new tier and your shiny new rewards will appear in the My Astro app. You are still eligible for all the rewards from previous tiers too.
STEP 1
Switch off the power for your box and make sure that the adapter's power light is off.

STEP 2
Locate the Smartcard at the front or right side and gently pull it out make sure that the adapter's power light is off.

STEP 3
Wipe the Smartcard's gold chip clean using a dry soft cloth.

STEP 4
Make sure the gold chip is facing upwards and reinsert it all the way in.

STEP 5
Switch on the power for your box and make sure that the adapter's power light is on. Please wait for 5 minutes.

STEP 6
Turn on your box. You should no longer be experiencing this problem.
If issue persist, please submit the issue in our Feedback Form and attach a picture of your General tab of the STB Diagnostics for assistance.

To request for a move, you may choose to:
(The fastest way) Self-serve by logging in to My Astro and follow the steps below:
1. Download the My Astro app or use the web version of My Astro
2. Login using your Astro ID
3. Go to Account > Profile > Address
4. Tap on the edit icon on 'Service address'
5. Verify your identity via SecureGo or OTP
6. Fill in your new address and confirm your relocation
7. A support ticket will be created and we will be in touch
OR
Submit your feedback via below link: https://support.astro.com.my/feedback-form
1: Choose Feedback Type
2: Fill in the form and click “Submit” support ticket.
Yes, customers will be charged a fixed Paper Bill Fee of RM10.00 per bill every month for each account.
Yes. You are entitled to separate Netflix accounts for each main Astro subscription e.g. If you have subscribed to Entertainment Plus, Platinum Pack, etc separately. Therefore, if you have more than one main Astro subscription with Netflix, you may choose to create multiple email addresses to activate each respective Netflix subscription. Please follow the steps provided to you via email/SMS in order to activate your Netflix subscriptions on the website.
STEP 1
Check your current software version on your box.
If the software version updated (Refer to Table 1) , proceed to STEP 2.
If software version different from Table 1, click here for Software Update guide.

Table 1
Once software is updated, tune to the impacted channel.
If issue persist, proceed to STEP 2.
STEP 2
Run Test Satellite Frequency.
Click here for the guide.
If dCSS Scan Entrypoint Success, proceed to submit report here.
Guide to submit report:
At Feedback Type select "I have Astro service related question/request" and Sub Category as "Technical Interruption".
Fill up all the required information and submit.
Please indicate if you agreed to recontract for 12 months (technical visit is FOC) or paid visitation (RM65).
You will receive appointment details via SMS within 48 hours.

If dCSS Scan Entrypoint Fail, proceed to STEP 3.

STEP 3
Proceed to Update Satellite Frequency.
Click herefor the guide.
Once completed, tune to the impacted channel.
If issue persist, proceed to submit report here.
Guide to submit report:
At Feedback Type select "I have Astro service related question/request" and Sub Category as "Technical Interruption".
Fill up all the required information and submit.
Please indicate if you agreed to recontract for 12 months (technical visit is FOC) or paid visitation (RM65).
You will receive appointment details via SMS within 48 hours.
If you’re facing issues updating your email address via My Astro, here’s how you can update your email address through your Set Top Box (STB).
Note: This method only works if you are on Ultra or Ulti box that is connected to the internet. If you are on an older box, kindly reach out to us via our Feedback Form.
If you’re still unable to update your email address, kindly reach out to us via our Feedback Form and a representative from our team will get in touch to assist you soon.
At this point in time, the Disney+ app on Astro Ultra and Ulti Box does not support Dolby audio. We are working to enable this in a future update.
There will be no changes to your HBO Max app subscription. You can continue accessing the app as usual. However, due to Warner Bros. Discovery (WBD) and Astro's partnership model going forward, the HBO HD (CH 411), Cinemax HD (CH 412), HBO Family (CH 414) and HBO Hits (CH 415) channels will cease on Astro at 11:59 PM on 28 February 2026.
If you are unable to log in to the Astro Smart TV app, please follow the steps below:
1. Verify Your Astro ID Credentials
2. Check Your Internet Connection
3. Update the Astro App and TV Software
4. Restart the App
5. Reinstall the Astro App
If you are still unable to log in, proceed to submit report via WhatsApp or Feedback Form and provide:
This information will help the support team investigate and resolve the issue more quickly.
1. Open/Download the My Astro app or visit My Astro web.

2. Login with your Astro ID.
3. Go to Account.

4. Under Billing, tap on Auto Debit.

5. Select 'Update expiry date'.

6. Key-in the expiry dates, then tap 'Save'.

7. A successful notification will be displayed.

If you already have a WeTV subscription, you are allowed to subscribe to WeTV VIP with the same mobile number via Astro; however, your existing account will continue to run until you manually cancel it. With two active subscriptions with the same mobile number, your subscriptions will be added on top of your existing account and you will be charged twice on two separate accounts.
Astro customers can subscribe to Simply South at only RM10.00 per month (excluding tax).
Any purchases via the Astro Smart TV app such as Pay-Per View and Astro First are subjected to 8% govt. tax.
If you have forgotten your username or password, you may follow the steps below:
Step 1. Go to netflix.com
Step 2: Click on Sign In
Step 3: Click on "Need Help
Please ensure that you are using the correct ID for eKYC submission.
For Malaysians :
1. Please ensure you are using MyKad or MyTentera.
2. Capture the front and back of your ID.
3. Ensure that there is no glare when capturing the photo.
4. Ensure that are capturing it in a bright room to have the highest picture quality.
5. Please do not cover your ID when capturing it, as it may impact the OCR Optical Character Recognition accuracy.
For Malaysian Permanent Resident and Other Nationality :
1. Please use Passport only.
2. Please capture your whole passport, which has your personal information on it and your signature.
3. Ensure that there is no glare when capturing the photo.
4. Please do not cover your ID with your when capturing it, as it may impact the OCR Optical Character Recognition accuracy.
Unfortunately, subtitles and dubbing options are currently not available.
electronic Know-Your-Customer (eKYC) is an online process of identifying and verifying individual customers using electronic means. This enables a person to be an Astro customer anytime and anywhere, hassle-free and helps to secure your Astro account by protecting it from unauthorised usage.
Yes. You may subscribe to Disney+ through Astro even if you already have an existing Disney+-billed subscription.
a. If you subscribe to the same or higher Disney+ plan through Astro and activate it using the same login credentials (i.e. email address or mobile number and password) associated with your existing Disney+-billed subscription, your existing Disney+-billed subscription will be automatically paused by Disney+ for as long as your Astro-billed Disney+ subscription remains active.
For example:
b. If you subscribe to a lower Disney+ plan through Astro, your existing Disney+-billed subscription will remain active and your Astro-billed Disney+ subscription will be treated as an additional subscription. In this situation, you may end up with more than one Disney+ subscription.
For example:
If you wish to make changes to or cancel your existing Disney+-billed subscription, you will need to contact Disney+ directly.
STEP 1
On your remote, press the HOME button.

STEP 2
Navigate to SETTINGS icon and press "OK".

STEP 3
Navigate to Manage Satellite Frequency and press “OK”.

STEP 4
Choose to Update Satellite Frequency and press “OK”.

STEP 5
Choose "Confirm" to continue Satellite Frequency Update and press “OK”.

STEP 6
Satellite Frequency Update progress screen will be displayed.
The updates will take approximately 20 minutes.

STEP 7
The status will be displayed once update is complete.

Yes, you can choose the other Astro Packs, which do not have Netflix bundled together. However, any changes in your Astro Pack are subject to the terms & conditions.
STEP 1
Switch off the power for your box and make sure that the adapter's power light is off.
STEP 2
Locate the Smartcard at the front or right side and gently pull it out make sure that the adapter's power light is off.
STEP 3
Wipe the Smartcard's gold chip clean using a dry soft cloth.
STEP 4
Make sure the gold chip is facing upwards and reinsert it all the way in.
STEP 5
Switch on the power for your box and make sure that the adapter's power light is on. Please wait for 5 minutes.
STEP 6
Turn on your box. You should no longer be experiencing this problem.
If issue persist, please submit the issue in our Feedback Form and attach a picture of your General tab of the STB Diagnostics for assistance.
STEP 1
Check the internet connectivity by run the Test Connection.
Refer Run Test Connection.

STEP 2
Verify the average speedtest based on the Test Connection result.
a. Above 10Mbps - Proceed to STEP 5
b. Less then 10 Mbps - Proceed to STEP 3
Notes: Minimum 10 Mbps internet speed from box requires in order to get a stable connection.

STEP 3
Check the connection to the box either using Ethernet (LAN cable) or Wi-Fi.
a. If using Ethernet (LAN cable) - Connect to Live Agent for help.
b. If using Wi-Fi - Proceed to STEP 4
STEP 4
Check location of the decoder and router.
a. If nearby (within 1.5m) - Try connect to box from router using LAN cable.
b. If far (more than 1.5m) / No LAN cable - Proceed STEP 5
STEP 5
Reboot router, modem and decoder.
If issue persist, please try again after 30mins to 1 hour. Connect to live agent if persist after 30 mins to 1 hour.
STEP 1
On your remote, press the HOME button and the home menu will be displayed on top of your screen.

STEP 2
Navigate to SETTINGS.

STEP 3
Navigate to Audio Delay and press "OK".

STEP 4
Navigate to your preferred selection and press “OK”.

Returning your Astro box & Smart card/SIM card is a very simple process.
For existing Ultra Box or Ulti Box user, call 03-9543 3838 to schedule our courier partner to come pick up the box or drop them off at the closest Astro Service Centre or Exclusive Partner near you. Click here to find a Customer Service Centre (CSC) or Astro Exclusive Partner (AEP) near you.
For any unreturned Ultra Box or Ulti Box, a box fee of RM100 may be charged to your account.
For all other boxes, please recycle your box at a registered collection center that will properly manage the boxes in an environmentally friendly way. Click here to find a registered collection center near you.
The new packs and access to Netflix on the Ultra Box and Ulti Box is available for Astro IPTV customers.
STEP 1
Please wait while your Astro box initializes.

STEP 2
Select your preferred language.

STEP 3
Navigate to Next and press "OK".

STEP 4
Select Auto as the Video Resolution.

STEP 5
Navigate to Next and press "OK".
STEP 6
Navigate to Confirm and press "OK" to confirm your selection if you are able to read the texts on screen properly.
Otherwise, navigate to Cancel to revert to the previous settings.

STEP 7
Select Satellite as the box operating mode.

STEP 8
Navigate to Next and press "OK".

STEP 9
Select your preferred connection.
For connection via Wi-Fi, proceed to STEP 10.
For connection via LAN Cable, proceed to STEP 16 once you are connected.

STEP 10
Please wait while your Astro box searches for available Wi-Fi networks.

STEP 11
Navigate to your preferred Wi-Fi network and press "OK".

STEP 12
Please enter the password to connect to the Wi-Fi network.

STEP 13
Navigate to Done to continue.

STEP 14
Please wait while your Astro box connects to the internet.

STEP 15
Navigate to Yes to allow your Astro box to connect to this network automatically.
Otherwise, navigate to No.
Proceed to STEP 17 for the next step.

STEP 16
Navigate to Next and press "OK".
STEP 17
Navigate to Universal.

STEP 18
Navigate to Next and press "OK".

STEP 19
Select 01 M3B VL - 10732 as the Entry Point.

STEP 20
Navigate to Next and press "OK".

STEP 21
Please wait until the signal reading is updated.
Navigate to Finish and press "OK" to complete the settings.

Youou may visit and follow the steps shown in https://biz.astro.com.my/home-resources/astrobiz-selfcare-user-guide to create you Astro ID.
No, the Ulti Box does not support 4K UHD content. If you would like to watch Astro's 4K UHD content, please sign up for an Ultra box at Astro Ultra Box and Ulti Box | Astro.
STEP 1
Press "HOME" button on your remote control.

STEP 2
Navigate to Settings and press "OK".

STEP 3
Navigate to STB Diagnostics and press "OK".

STEP 4
Take a look at the HDMI Connection Status.