
A free satellite TV service from Astro. Watch lifetime entertainment, news, learning & information and more.
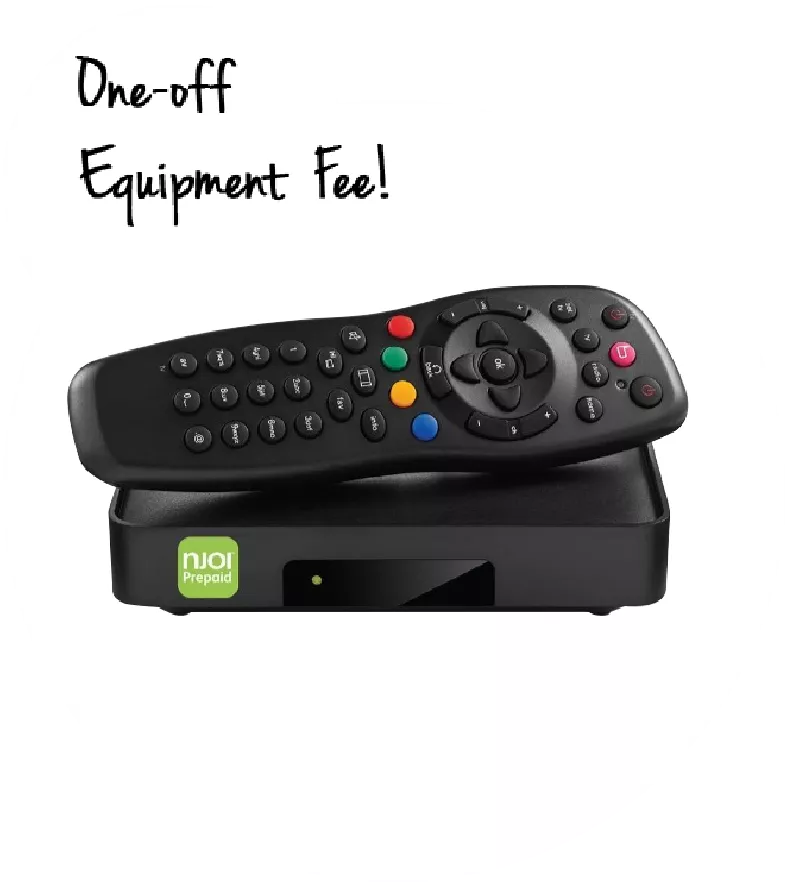
Pictures for illustration only.
Enjoy free access to 15+ TV channels & 10+ radio channels.
* Subject to Astro terms & conditions.


Step-1 |
Step-2 |
Step-3 |
Choose a plan & sign-up online. |
Sit back & wait for installation. |
Enjoy your new Astro / Broadband! |
A free satellite TV service from Astro. Watch lifetime entertainment, news, learning & information and more.
Pictures for illustration only.
New decoder only without satellite dish & cabling. You must have Astro/Njoi satellite dish and cable installed and working properly.
Including installation.
New decoder complete with satellite dish & cabling.
Including installation.
Applying for
| Njoi Astro UniFi Maxis |
Find your answers here.
We provide one stop service to apply Astro and Broadband for you.
You can avoid driving and queuing at the sales counter. We are the dealer that can help you to handle your application from the beginning to the end.
We do not charge you when you apply from us. There is no credit card information required to apply here. Charges are the same as you apply from the sales counter.
First, you can apply online, we will get back to you immediately during business hour. WhatsApp/Email/Fax us your Photocopy of IC (for malaysian) / Passport (for foreigners). When we receive all the information, we will proceed with your application immediately.
Once we receive your application with complete information, we will process your application immediately during business hour. The contractor from the service provider will then contact you for installation appointment once your application is approved.
Enjoy greater savings and hassle-free bill payment in one single bill for both Astro and Broadband. You get to enjoy Astro and Broadband at discounted price every month over the contract period of 24 months.
Astro offers multiple TV packs including Entertainment, Sports, Movies and Kids options. You can choose a pack that matches your viewing preferences and add optional streaming apps where available.
Yes, you may subscribe to Astro TV packs without bundling broadband. However, bundling Astro TV with Fibre Broadband may provide better monthly savings and convenience with a single bill.
For small households with light streaming and browsing, 100Mbps is usually sufficient. Larger families, gamers or heavy streamers may benefit from 500Mbps or 1Gbps plans for smoother performance across multiple devices.
Most Astro TV and Fibre broadband plans come with a 24-month contract. Early termination charges may apply if cancellation is made before the contract ends.
Yes, you may upgrade your TV pack or broadband speed at any time, subject to eligibility and coverage. A new contract period may apply depending on the upgrade.
Your monthly bill will be issued directly by Astro. You may receive it via email or access it through your Astro account. Bundled customers will receive a single combined bill for TV and broadband services.
Payment methods may include online banking, auto debit, credit card or other approved payment channels provided by Astro. Our team can guide you during the registration process.
If you experience any service interruption, you may contact Astro customer support for technical assistance. In many cases, issues can be resolved remotely or a technician will be arranged if necessary.
Yes, relocation is subject to service availability at your new address. Relocation charges and contract adjustments may apply depending on your plan.
No, you do not need a credit card to submit your application. Payment setup will be arranged directly with Astro after your service is approved.
Selected Astro TV packs allow optional add-ons such as streaming services depending on current promotions and availability. Additional monthly charges may apply.
Yes, a WiFi router is typically provided during fibre installation. The router model may vary depending on the selected broadband speed plan.
Yes, we will check the service coverage at your address before proceeding with your application to ensure broadband is available at your location.
For Malaysians, please provide a copy of your MyKad. For foreigners, provide a copy of your passport when submitting your broadband application.
After your application is approved, the service provider typically contacts you within 2 to 7 working days to arrange the broadband installation appointment.
Most Astro Broadband plans come with a 24-month contract starting from your installation date. If you relocate, a new 24-month contract may apply at your new address.
Yes, you can relocate your broadband service, subject to service availability at the new address. Your contract may reset for another 24 months from the new installation date.
Yes, you may request to relocate broadband devices within your home. Non-standard installation charges may apply and are payable to the installer directly after assessment.
Yes, you can switch to Astro Broadband. To avoid service interruption, it is recommended to activate the new service before terminating your current broadband contract.
Standard installations may be free during promotions, but non-standard installations (e.g., device relocation or complex wiring) may incur extra charges payable directly to the installer.
STEP 1
Check the internet connectivity by run the Test Connection.
Refer Run Test Connection.

STEP 2
Verify the Test Connection results.
a. All connected successfully - Proceed to STEP 3
b. All connection failed - Proceed to STEP 4
c. Router connection successfully, others failed - Proceed to STEP 7

STEP 3
Please ensure your box with the latest software update from "General Diagnostics".
Refer to Check Software Version Status.
If your box status is other than "Your box has the latest update (a)", please proceed to update the software.
Refer Software Update guide.

STEP 4
Check the connection to the box either using Ethernet (LAN cable) or Wi-Fi.
a. If using Ethernet (LAN cable) - Connect to Live Agent for help.
b. If using Wi-Fi - Proceed to STEP 5
STEP 5
Check location of the decoder and router.
a. If nearby (within 1.5m) - Try connect to box from router using LAN cable.
b. If far (more than 1.5m) / No LAN cable - Proceed STEP 6
STEP 6
Reboot router, modem and decoder.
If issue persist, please try again after 30mins to 1 hour. Connect to live agent if persist after 30 mins to 1 hour.
STEP 7
Suspect there is an issue with your internet connection.
Please check with your internet service provider or if under Astro Fibre / Astro Broadband, connect to Live Agent for help.
Astro will send updates on your ticket status via WhatsApp. If you don’t receive any updates, you can call us at 03‑9543 3838 and we’ll help you track your ticket.
The Ultra/Ulti Plug & Play Box comes with a one-year box hardware warranty.
For self-installation, there is a warranty seal at the bottom of the Ultra/Ulti Plug & Play Box, which must not be removed or tampered with as this would void the one-year Ultra/Ulti box hardware warranty.
If you’re facing issues updating your email address via My Astro, here’s how you can update your email address through your Set Top Box (STB).
Note: This method only works if you are on Ultra or Ulti box that is connected to the internet. If you are on an older box, kindly reach out to us via our Feedback Form.
If you’re still unable to update your email address, kindly reach out to us via our Feedback Form and a representative from our team will get in touch to assist you soon.
STEP 1
Press "HOME" button on your remote control.

STEP 2
Navigate to My TV and press "OK".

STEP 3
Navigate to Bookings and press "OK".

STEP 4
Your list of your booking programs will be displayed.

STEP 1
On your remote, press the HOME button and the home menu will be displayed on top of your screen.

STEP 2
Navigate to Settings.

STEP 3
Navigate to Satellite Settings and press “OK”.

STEP 4
Navigate to LNB Setup and press “OK”.

STEP 5
Select Universal and press "OK".

STEP 6
Navigate to Next and press "OK" to confirm your selection.

STEP 7
Select 01 M3B VL - 10732 as the Entry Point.

STEP 8
Navigate to Next and press "OK" to confirm your selection.

STEP 9
Please wait until the signal reading updated.
Then navigate to Finish and press "OK" to complete the setup.

"Payment Due Date" refers to the payment deadline for your Astro bills each month.
If you would like more information or to provide feedback on Astro Rewards, kindly reach out to us at 03 9543 3838 or visit one of our Astro service centres.
Yes, you can request e-invoicing for your last month's bill if you obtain approval before the last date of the allowable period for the month: 5 days after the end date of the invoice period.
Scenario A (Only for Aug ’24):
Bill Date: 07 Aug 2024
Bill Start/End Period: 07 Aug – 06 Sept 2024
Timeframe requesting e-invoice: 07 Aug – 11 Sept 2024 (within 5 days after the end bill period)
Request Outcome: You will get the e-invoice for last month’s bill dated 07 Aug 2024.
Scenario B (For Sept ’24 onwards):
Bill Date: 01 Sept 2024
Bill Start/End Period: 01 Sept – 30 Sept 2024
Timeframe requesting e-invoice: 01 Sept – 5 Oct 2024 (within 5 days after the end bill period)
Request Outcome: You will be getting the e-invoice for last month’s bill dated 01 Sept 2024
Scenario C (For Sept ’24 onwards):
Bill Date: 01 Sept 2024
Bill Start/End Period: 01 Sept – 30 Sept 2024
Timeframe requesting e-invoice: 6 Oct 2024 onwards (more than 5 days after the end bill period)
Request Outcome: You will be getting the e-invoice for the next bill cycle.
Yes, you can! Simply South is available for all Astro customers. Kindly reach out us via WhatsApp by typing “Hi” at 03-9543 3838 to know more!
No, customers without an Ultra/Ulti Box will not be able to enjoy Sun NXT via their Astro Box. However, they can enjoy Sun NXT on their mobile devices. To enjoy Sun NXT on their big screen, customers can upgrade to an Ulti/Ultra box. Customers can check their eligibility for the free box swap by logging into the My Astro app or by contacting Astro’s customer service at 03 9543 3838.
1. Open/Download the My Astro app or visit My Astro web.

2. Login with your Astro ID.
3. Go to Add on Apps.

4. Under Apps categoty, tap Show more to show the full list of available Apps.

5. Select the require App to add-on and tap 'Proceed'.

6. Review order, select agreed and tap on 'Confirm order'.


7. Select 'Approve' to edit add-ons.

8. A confirmation order will be displayed and click 'Done' to close.

You do not need to request for a reconnection as our system will detect your payment and process it immediately, provided you paid via a real-time payment channel.
Click here for a full list of our payment channels.
STEP 1
Press "HOME" button on your remote control.

STEP 2
Navigate to Settings and press "OK".

STEP 3
Navigate to Installation Settings and press "OK".

STEP 4
Enter your PIN to access this setting. (Default PIN is 0000).

STEP 5
Navigate to Restore Factory Settings and press "OK".

STEP 6
Navigate to Yes, continue and press "OK" to confirm your selection.
Otherwise, navigate to No, go back to maintain the settings.

STEP 7
Please reboot your box.

STEP 8
New Installation Settings screen will appear.
Click here to follow New Installation Settings guide.

The WiFi SSID and password of the Mesh unit will be automatically synchronized to the WiFi router. Hence, there is no need to configure the WiFi parameters.
*WiFi SSID (Service Set Identifier) is the name of your wireless network, also known as Network ID. It is viewable to anyone with a wireless device within reachable distance of your network.
Your documents will be handled in compliance with standards set by PDPA (Personal Data Protection Act 2010) and will not be used for other means without your specific consent.
There will be no installation fee for both Astro Box and Ultra Box. The Multiroom (second decoder) must be installed at the same registered address as your primary subscription.
No, the Ulti Box does not support 4K UHD content. If you would like to watch Astro's 4K UHD content, please sign up for an Ultra box at Astro Ultra Box and Ulti Box | Astro.
Astro One Packs are as follows:
The Astro One: Entertainment Pack for a wide range of favourite vernacular entertainment, including the best Malay, Korean, Chinese, Indian, Kids and international shows enjoyed by Malaysian families.
A sports-filled fiesta with Astro One: Sports Pack that comes with all our Sports channels, on top of what is on the Entertainment pack.
Astro One: Epic Pack, an indulgence for those who want it all. Adding on to the Entertainment pack and Sports pack, this unrivalled streaming experience will include the best from their favourite streaming apps, all on a single platform.
For more information, visit www.astro.com.my
Yes, the current service tax law does not exempt services provided to customers residing in Labuan, Langkawi, and Tioman.
Further details on pricing, billing and availability will be confirmed in coming months. Look out for more details and register your interest via https://astro.com.my/Netflix
Your Astro X3 pack will be activated immediately after you complete your sign-up. Once your sign-up is complete, you can start streaming its content immediately via the Astro app on your Smart TV or through Astro GO on supported devices
a) If you sign up via Astro’s Official Website:
You will be required to create an Astro ID and password during sign-up. Once your subscription is successfully activated, you will receive a "Welcome to Astro" email confirming your activation and can start streaming right away.
To find out more, please visit: Here
i. If you sign up via Astro Sales Agents:
ii. You will receive a “Welcome to Astro” email prompting you to create your Astro ID password and confirming your successful activation. Once your password is set, you can start streaming.
b)Important Notes:
i. When creating your Astro ID, you will be required to use an Astro ID that is not linked to an active Astro account. If the Astro ID (i.e. email address) you enter is already linked to an active Astro account, you will be prompted to use a different Astro ID
ii. However, if the Astro ID you enter is linked to an inactive Astro account, you will have the option to reuse that Astro ID.
STEP 1
On your remote, press the HOME button and the home menu will be displayed on top of your screen.

STEP 2
Navigate to Settings.

STEP 3
Navigate to Audio and press "OK".

STEP 4
Navigate to your preferred selection and press “OK”.

You may enquire by submitting a Feedback Form. Please choose the following feedback type and issue:
Feedback type : Payment/Billing
Issue : I want to ask about a refund
OR
Reach out via Astro Official Digital platform i.e. Facebook or Chat. Our agent will assist on your request.
Yes. You can explore the My Astro app even if you’re not logged in. Click at “Continue as guest” to check out the app features before singing up or logging in.
However, if you're an Astro customer we recommend you sign up/login with your Astro ID for the best experience. Here's how to link your Astro account to your Astro ID.
Download My Astro app or visit the My Astro website.
Astro does not provide installment plan facilities. You are advised to pay your charges before the due date, as per your monthly bill statement.
STEP 1: Power Off the Box
Switch off the power for your box. Ensure the adapter's power light is off.

STEP 2: Remove the Smart Card
Locate the Smartcard at the front or right side and gently pull it out.

STEP 3: Clean the Smart Card
Wipe the Smartcard's gold chip clean using a dry soft cloth.

STEP 4: Reinsert the Smart Card
Make sure the gold chip is facing upwards. Insert the Smart Card fully into the slot until it seats firmly.

STEP 5: Power On the Box
Switch on the power for your box and make sure that the adapter's power light is on. Please wait for 5 minutes.

STEP 6: Turn On the Box
Power on the box and check if the issue is resolved.

If issue persist, please submit the issue on our Feedback Form and attach a picture of your smart card number for assistance or chat us via WhatsApp at 03-95433838.
To request for a move, you may choose to:
(The fastest way) Self-serve by logging in to My Astro and follow the steps below:
1. Download the My Astro app or use the web version of My Astro
2. Login using your Astro ID
3. Go to Account > Profile > Address
4. Tap on the edit icon on 'Service address'
5. Verify your identity via SecureGo or OTP
6. Fill in your new address and confirm your relocation
7. A support ticket will be created and we will be in touch
OR
Submit your feedback via below link: https://support.astro.com.my/feedback-form
1: Choose Feedback Type
2: Fill in the form and click “Submit” support ticket.
There will be no changes to your HBO Max app subscription. You can continue accessing the app as usual. However, due to Warner Bros. Discovery (WBD) and Astro's partnership model going forward, the HBO HD (CH 411), Cinemax HD (CH 412), HBO Family (CH 414) and HBO Hits (CH 415) channels will cease on Astro at 11:59 PM on 28 February 2026.
If you are currently on the Disney+ Basic plan, your plan will automatically be renamed to Disney+ Standard. You will also be able to stream on up to 2 devices concurrently instead of 1 previously and enjoy unlimited device registrations with no change to your monthly fee.
If you are currently on the Disney+ Premium plan, you will be able to stream on up to 4 devices concurrently instead of 3 previously and enjoy unlimited device registrations with no change to your monthly fee.
For further information and support relating to the Disney+ app experience or app-related features, please visit the Disney+ Help Centre.
All streaming apps will be made available on the Ultra Box first, followed by the Ulti Box. If you would like to upgrade to the Ultra Box, please visit product.astro.com.my/tv or reach us via WhatsApp by typing “Hi” at 03-9543 3838 for assistance.
No, you will not be able to manage your account with the Astro Fibre App. However, you may download the “MyAstro” app on your mobile device now to manage your Astro account in a fast and easy way.
Tak dapat connect WiFi atau internet langsung? Takpe, Brader Astro boleh bantu.

Skyworth RG21

Login using your username and password if you have changed the router login setting. Otherwise, your default router login is as per below.
Username: user
Password: user
4. Once you have successfully logged in, the router's web-based setup page will appear.

5. At the top of the page, click WLAN to configure the WiFi parameters.

6. To change the channel on 2.4G, click the drop-down arrow for Channel, then select your desired channel.

7. Then, click "Save & Apply" for the changes to take place.

8. You may make the same changes for 5G by click the drop-down arrow for Channel, then select your desired channel.

9. Then, click "Save & Apply" for the changes to take place.

After 62 days of non-payment, your broadband account will be terminated, and an Early Termination Fee (ETF) will be applied for the remaining contract. If you would like to continue with the service, you need to clear the outstanding balance and apply a new account.

1. Please standby computer/laptop to access to the internet and connection must be via LAN (cable) [Connect the LAN (cable) to the yellow port in Maxis Router and direct to computer/laptop].
2. You may open any web browser such as Google Chrome, Internet Explorer, Mozilla Firefox and etc.
3. On the address bar, please go to http://192.168.1.254 and below page will appear.

If below box appear, please enter required details as below:

USERNAME: Administrator
PASSWORD: (ACCESS KEY AT THE RGW STICKER)
(These are the defaults, if you have done previous configuration on your router the password may be different)
4. Once enter into the page ‘’TECHNICOLOR TG784N V3’’, you may follow below step for the wireless information.
i. Click "Configure”

ii. Once clicked configure button, below screen will appear.

A. This is your current password. Please delete and enter the new password.
B. Once completed the selection; click the "Apply" button. Router will auto reboot and connection re-establish after few minutes.
Please re-connect your wireless using the new password.
For TV packs only, 24-months contract commitment period. However, if in addition to the TV packs, if you would like to also sign-up for Broadband, the contract commitment will be 24 months as well. If you're an existing customer, your existing remaining contract duration (if any) will not be carried over to the new contract except for existing Disney+ (3 Months Pack) and Multiroom subscription contract durations which will be carried over upon the migration to new packs.
Note: If you are subscribing to a bundle pack which includes Netflix or Disney+ for the first time, you are required to maintain the respective app as part of your bundle selection for a minimum of 12 months, otherwise a cancellation fee will apply.
IRBM is introducing e-invoicing to make tax processes more manageable and efficient for both businesses and the government. This enables a better and smoother customer experience.
Please ensure that you are logging in with the correct Astro ID and password. If you cannot remember your password, use the “Forgot Password” option to reset.
If the issue persists, you can submit an enquiry through our feedback form here. Please refer to the steps below:
Step 1: Select Feedback Type: Technical issues
Step 2: Select Issue: I have an enquiry/issue with Apps
Then choose the app you’re having trouble logging into and submit the form.
We will get in touch with you within 48 hours.
Important: To use Astro GO, My Astro, and other partner apps included in your subscription, your Astro ID must be linked to an active Astro subscription. You can refer to the steps here to learn how to link your Astro ID.

Huawei K562e
1. Please connect your computer or laptop to your Astro Fibre router using LAN cable. Your LAN cable must be connected from the yellow port of Astro Fibre router (Any available port).
2. Once connected, open any web browser such as Google Chrome, Internet Explorer, Mozilla Firefox and etc.
3. On the address bar, type http://192.168.100.254 and below page will appear.

Login using your username and password if you have changed the router login setting. Otherwise, your default router login is as per below.
Username: user
Password: user
4. Once you have successfully logged in, the router's web-based setup page will appear.

5. At the top of the page, click More to configure the WiFi parameters.

6. From the left menu, select WLAN and choose Wi-FI Advanced Network to access the screen below.

7. To change the channel on 2.4 GHz and 5 GHz, click the drop-down arrow for Channel, then select your desired channel.

8. Then, click "Apply" for the changes to take place.

STEP 1
Identify your remote control:

a) Remote control with Astro logo at the bottom of the remote, proceed to STEP 2.
b) Remote control with Astro logo at the top of the remote, proceed to STEP 4
STEP 2 (Astro Logo at the bottom of the Remote)
On your remote, press the “set tv” button and set tv instructions will be displayed on top of your screen:

STEP 3
Follow the steps appear on the TV screen to sync your Astro remote and complete the setup.

STEP 4 (Astro Logo atthe top of the Remote)
Press and hold “tv input” key on bottom left of the remote for 3 seconds until the LED blinks twice.

STEP 5
Enter the 2-digit TV Code of your TV Brand and the LED will blink twice:

STEP 6
Try out the TV controls (TV Standby or adjust Volume) to check if they are working correctly.

STEP 7
Press ok and wait for the LED to blink twice to save the settings.
You can access up to 3 concurrent screens, including your Ultra Box/Ulti Box. Each subscription allows you to register up to 5 devices. To ensure a smoother streaming experience, please sign out from any unused devices.
The Malaysia Communication and Multimedia Commission (MCMC)has issued a directive to all telecommunication companies (telcos) to block the sending and receiving of SMS with URL links. The move is aimed at preventing users from becoming victims of online scams. This exercise is applicable for all person-to-person SMS with URL links sent to or received from local and international mobile numbers, which has already taken effect as of 2 May 2023.
If an error message on your TV has one of the following keywords:
- Switch to Continuous Viewing
- Service Currently Not Available (SCNA)
- (Code: SCNA)
You can proceed with the troubleshooting steps below if the weather is good. Otherwise, you may try again later.
STEP 1
On your remote, press the Home button and the home menu will be displayed on top of your screen.

STEP 2
Navigate to Settings.

STEP 3
Navigate to Satellite Settings and press OK.

STEP 4
Navigate to Diagnostics and press OK.

STEP 5
Refer to the signal strength on your screen.
If it is 65 or higher, please take the screenshot and submit your feedback form.
If it is below 65, please go to Step 6.

STEP 6
Switch off the power for your box and make sure that the adapter’s power light is off.

STEP 7
Unscrew the satellite cable from the box and pull it out.

STEP 8
Plug the satellite cable back into the box and screw it back securely.

STEP 9
Switch on the power for your box and make sure that the adapter’s power light is on. Please wait for 5 minutes.

STEP 10
Turn on your box. You should no longer be experiencing this issue.
If issue persist, please submit the issue on our Feedback Form with error details and attach a picture of your General tab of the STB Diagnostics for assistance.
Centralised Dish
If your Astro Box is connected to your apartment or condo building's centralised dish and the issue persists, please contact your respective Building Management before reaching out to our agents.
We have discontinued offering the PVR box to our customers. You may opt to take up our latest 4K UHD supported Ultra Box instead. For more information, visit https://product.astro.com.my/box.
Alternatively, you may reach out to us at 03-7481 8000 for further enquiries or to sign up for the Ultra Box.
STEP 1: Confirm TV Input Source
Use your TV remote to select the correct input:
HDMI for HDMI cable users.
AV/Video for RCA cable users.
Cycle through inputs (HDMI1, HDMI2, AV1, etc.) until the Astro box screen appears.
STEP 2: Check Cable Connections
HDMI Users:
Ensure HDMI cable is firmly connected to both the Astro box and TV. Try a different HDMI port or cable if needed.

RCA Users:
Match red (audio right), white (audio left), and yellow (video) cables to the correct ports. Ensure cables are not loose or damaged.

STEP 3: Power Cycle the Astro Box
Turn off the Astro box.
Unplug the power cable from the wall socket.
Wait 10 seconds, plug it back in, and turn it on.


STEP 4: Test with Alternative Port or Cable
Try a different HDMI or AV port on your TV. Use a different HDMI or RCA cable to rule out faults.
STEP 5: Contact Astro Support
If no improvement seen, please submit the issue in our Feedback Form and attach a picture of your smart card number for assistance or WhatsApp us at 03-95433838.
STEP 1
On your remote, press the Home button and the home menu will be displayed on your screen.

STEP 2
Navigate to Profile.

STEP 3
The Profile Selection Screen will be displayed.

STEP 4
Navigate to Add Profile.

STEP 5
Choose your Profile.

STEP 6
Input the Profile Name and navigate to DONE.

STEP 7
Choose the Age Group of the new profile and press "OK".

STEP 8
Your new profile will be shown in the Profile Selection Screen.

Your bill statement will include details of your monthly subscription charges; e.g. charges for your chosen Astro packages and Broadband service. It will also show the time period of which your first bill will cover, as well as indicate how much the total charges are and when the payment due date is.
You may contact Astro's Contact Centre (03 - 9543 1543) to process the cancellation.
The Mesh WiFi device(s) needs to be returned upon service termination via an arranged pick-up by our installers.
Photograph or scan your payment receipt, and send it to one of our contact platforms found here.
Upon logging in or creating a new account, you will be prompted to link your Astro Account to your Astro ID.If you do not have an Astro ID, please follow the steps in to create one and linking if to your Astro Account: